You have asked for it in many and finalmentsand we're happy to bring you all the guidance on how to install the Google Camera on your Mi A2 and Mi A2 Lite device, the sequel to the gloria so Mi A1 of Xiaomi, which also embrace the Android One project. To be honest Mi AXMUMX has a photographic sector that already performs its work in an excellent way, giving shots that with some trick can compete with camera phone more noble, in short, small works of art. Xiaomi Mi A2 Lite, perhaps it is the one that best lends itself to this modding operation, which I remind everyone must be performed by competent and capable people. And so on with the disclaimer:
ATTENTION: The guide involves modding operations which, if performed incorrectly, could damage your device. Therefore we recommend the operation only to those who have good experience in the Android universe. The XiaomiToday.it staff assumes no responsibility for any damage to your device.

But let's not waste any more time, and let's start with this guide that will allow you to enjoy the potential of the GCam on your Xiaomi Mi A2 and Mi A2 Lite. In this specific case, the test was performed on Mi A2 Lite but the guide is also functional for Mi A2, with the only consideration that of course what changes is the boot.img file to be patched. But before starting, I invite you to view our reviews related to We are A2 e Mi A2 Lite.
How to install the Google Camera GCam on Xiaomi Mi A2 and Mi A2 Lite
Prerequisites:
- Pc Windows with operating system Windows 10
- Smartphone Mi A2 / Mi A2 Lite at least 70% charged
- driver ADB and Fastboot installed (click , promising for download)
- Google Camera mod (I recommend the GCam Arnova for Mi A2 Lite you can find , promising, or find the one you prefer looking for , promising)
- Package containing the boot.img and files for install GCam that you can download from , promising
WARNING: the boot.img file contained in the archive refers to the Mi A2 Lite device with ROM V9.6.6.0.ODLMIFF. If you have a different ROM from this you have to provide to extract the boot.img file related to your version possibly downloading the ROM from , promising for Mi A2 e , promising for MI A2 Lite. Or do some research on the net but pay attention to what you download because you could bootloop your device.
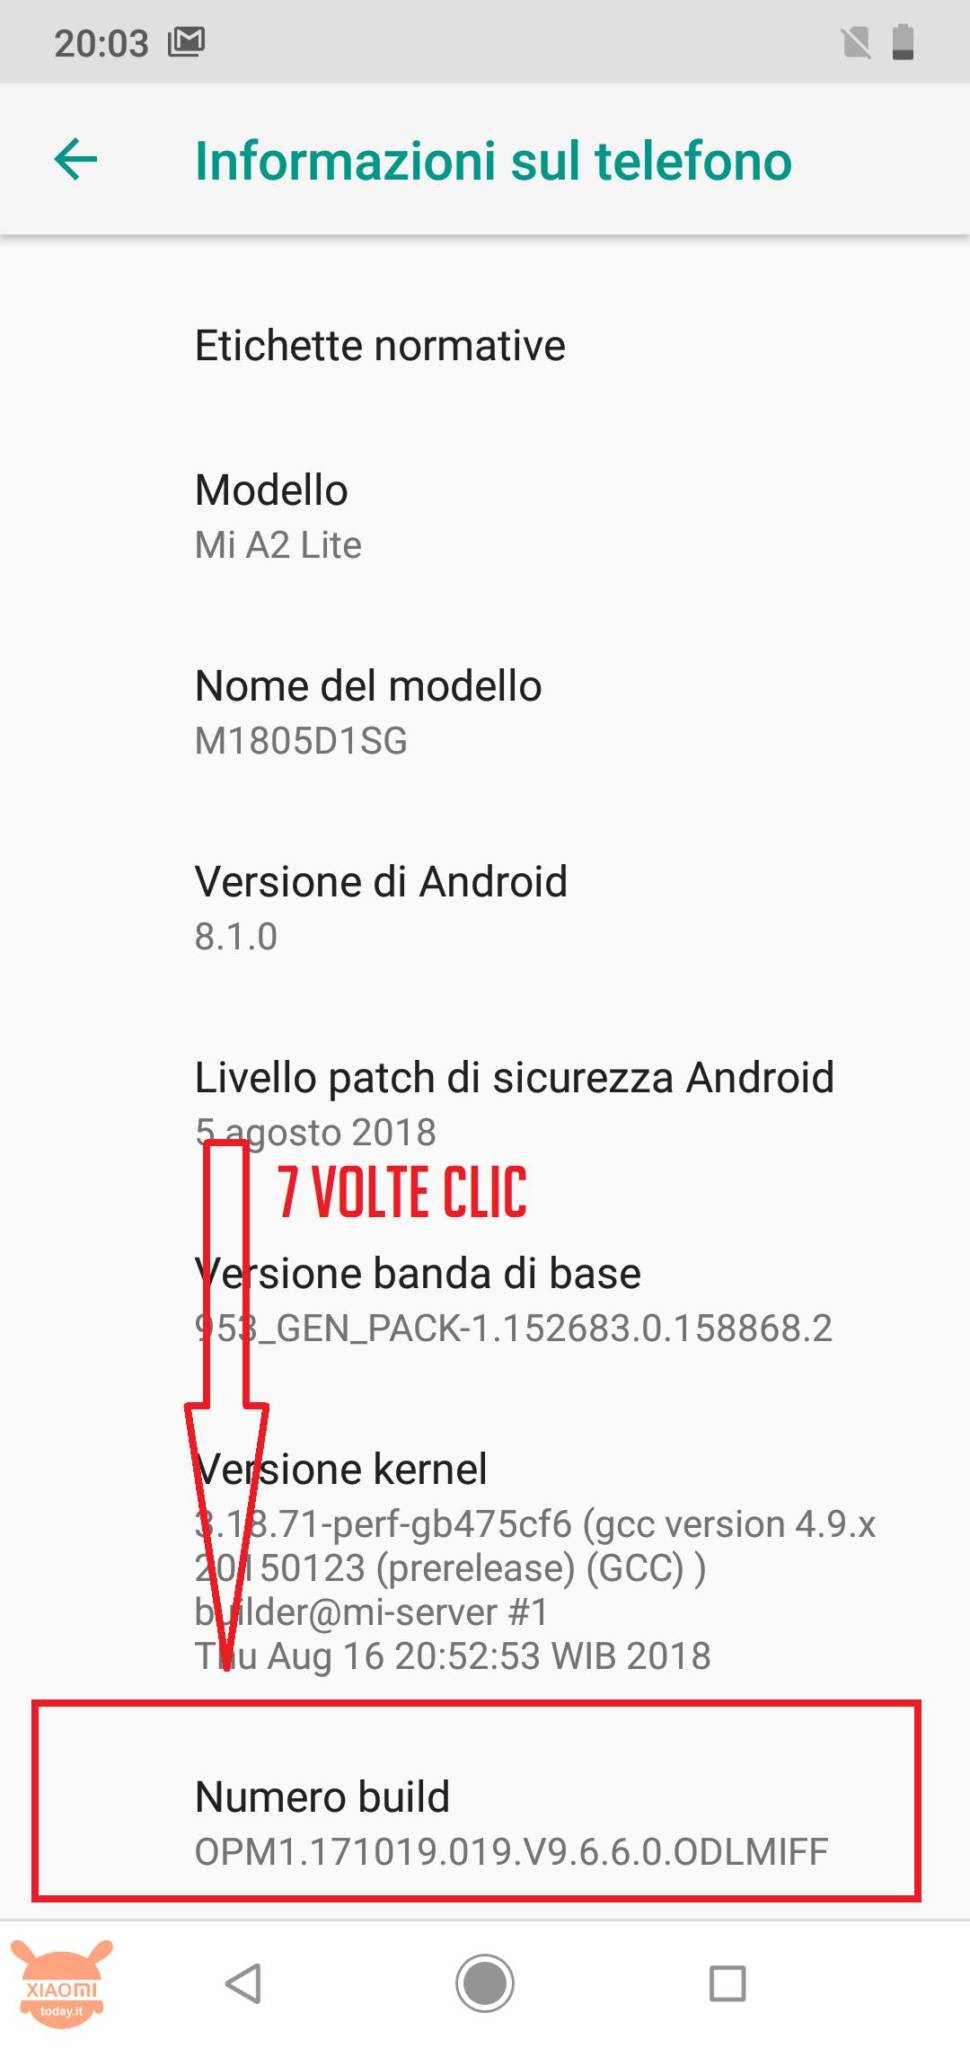
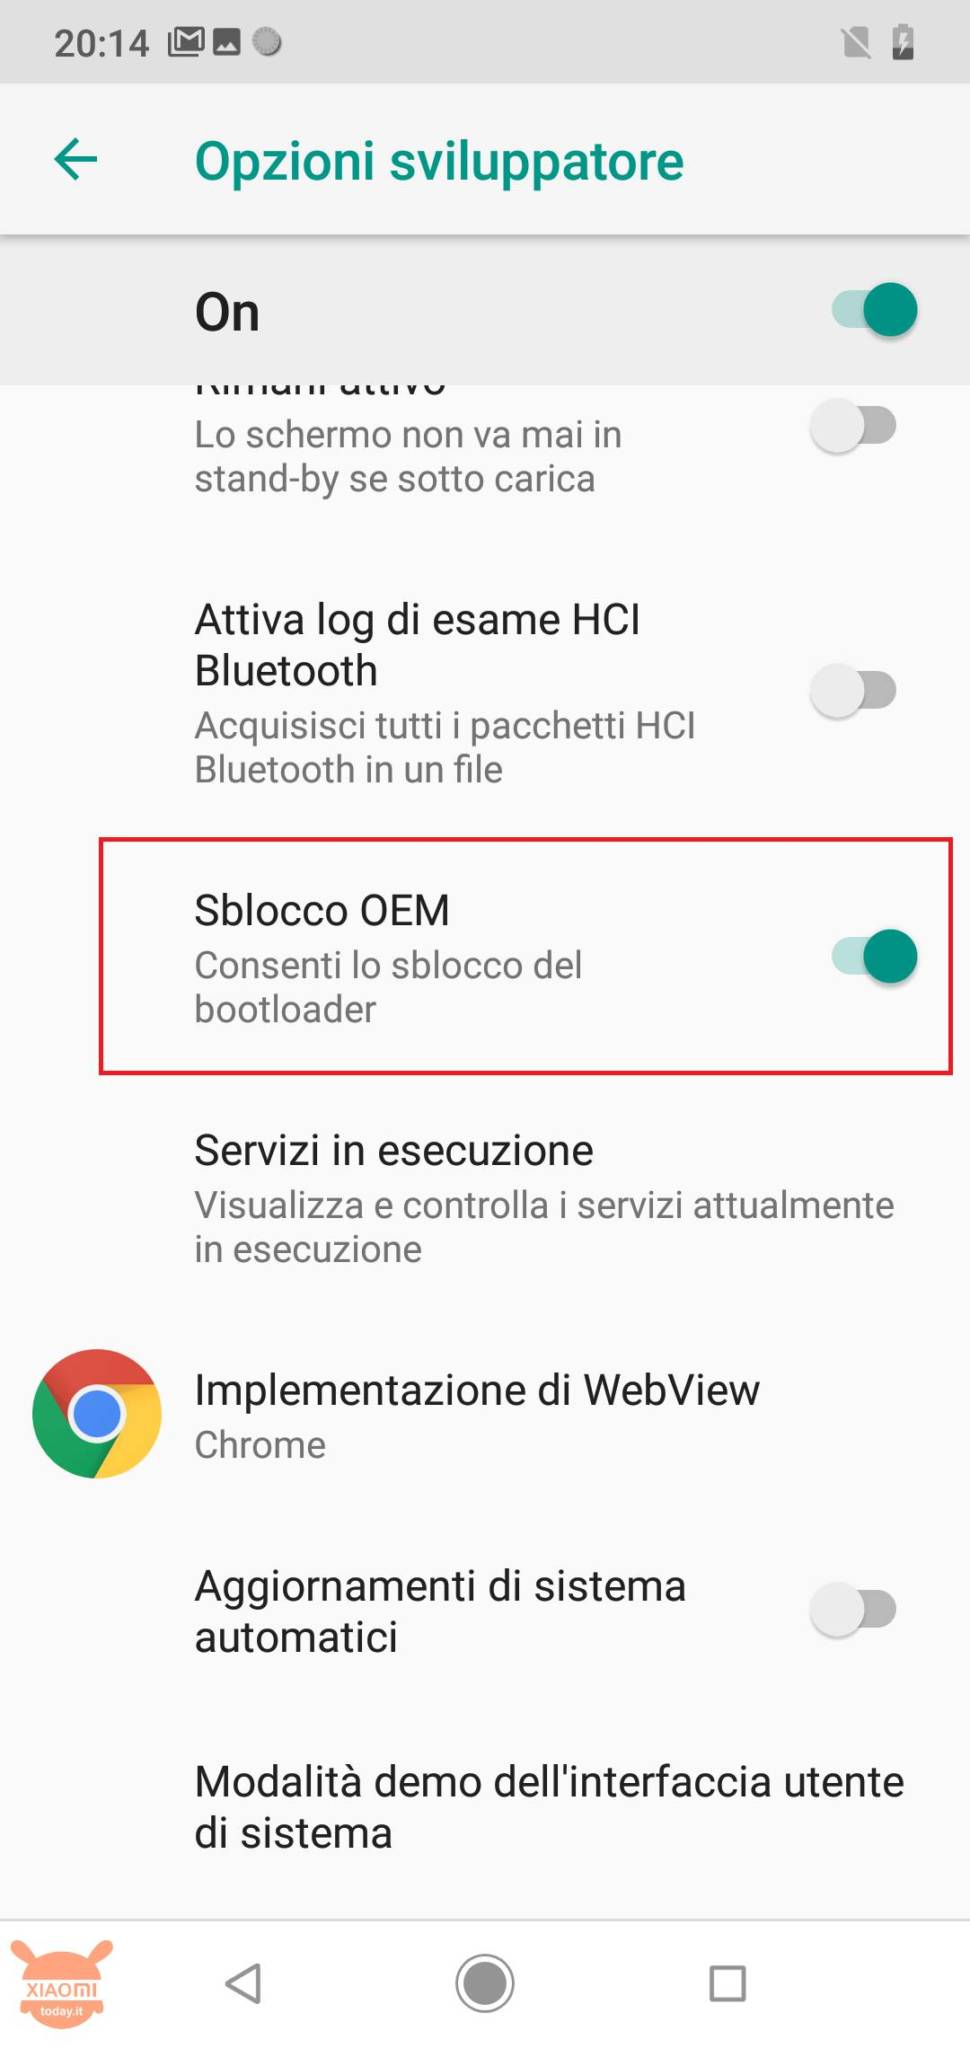
1) Go in Settings - System - Information on the phone - touch the voice repeatedly (seven times) "Build number" until enable Developer Options.
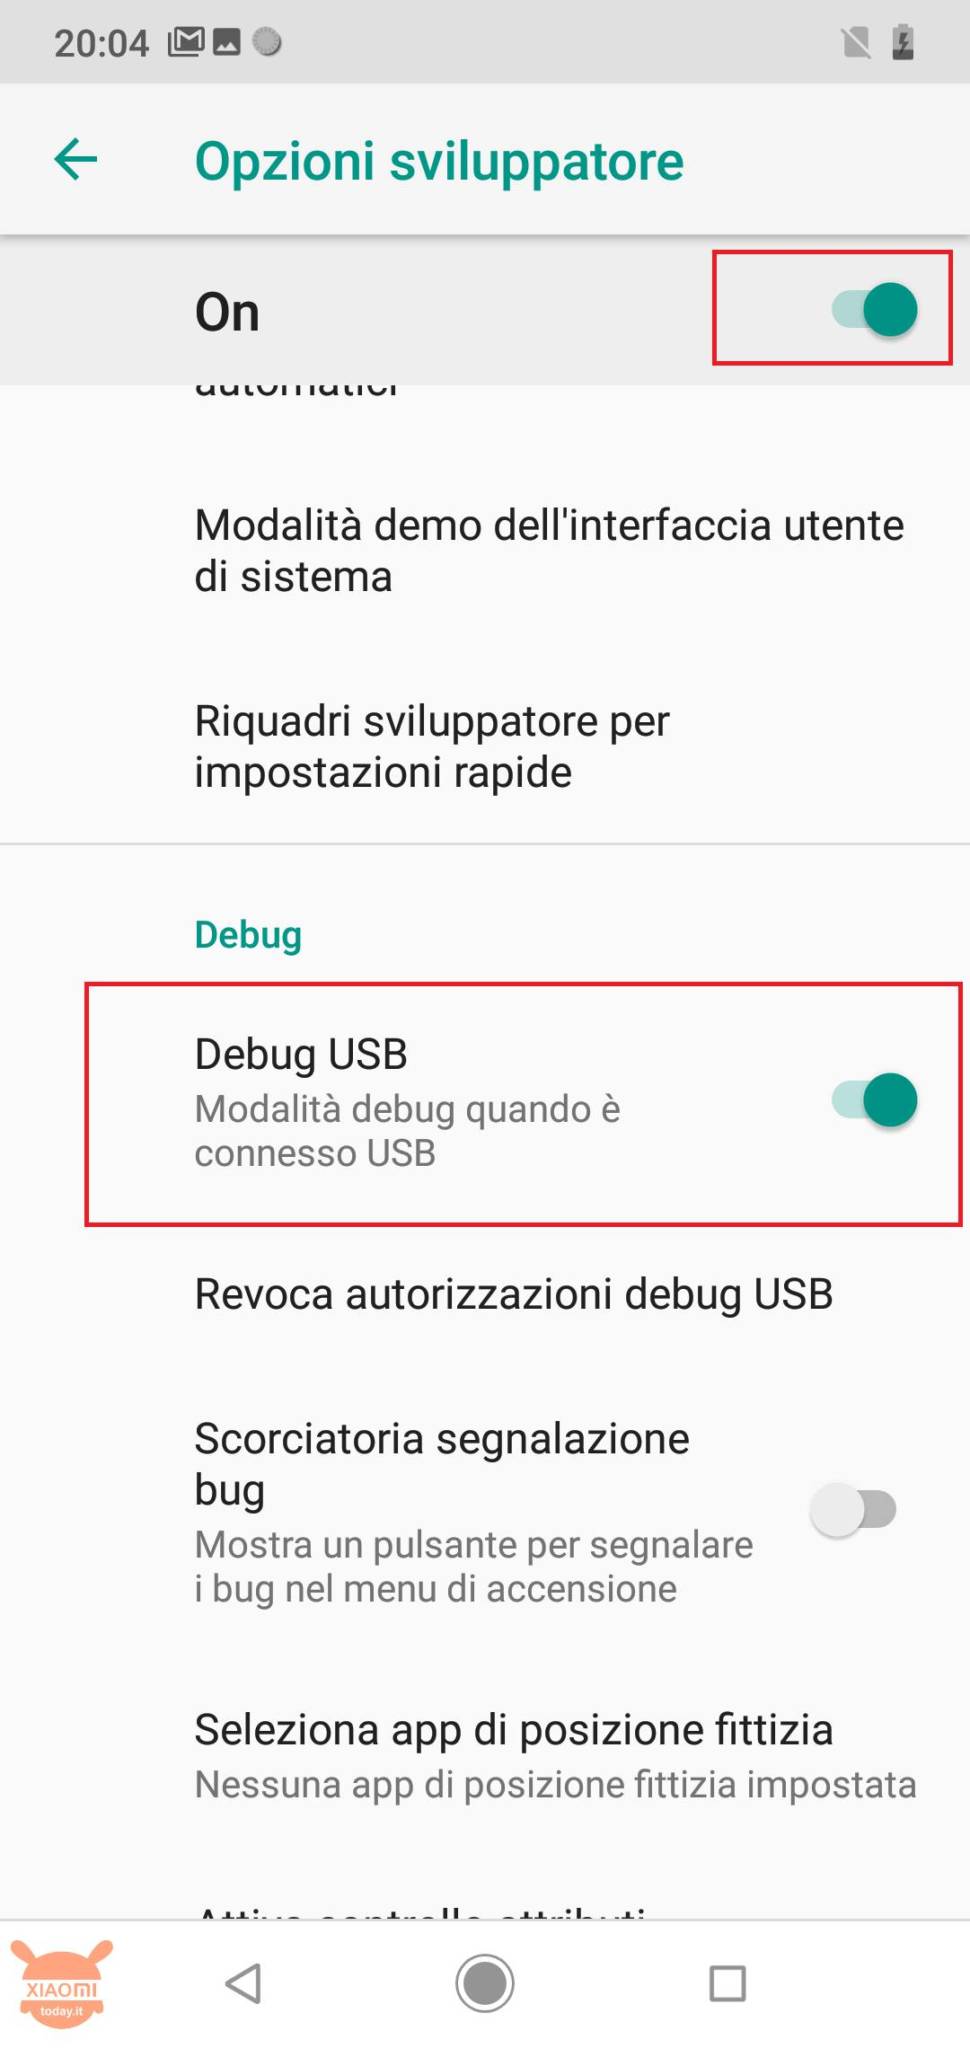
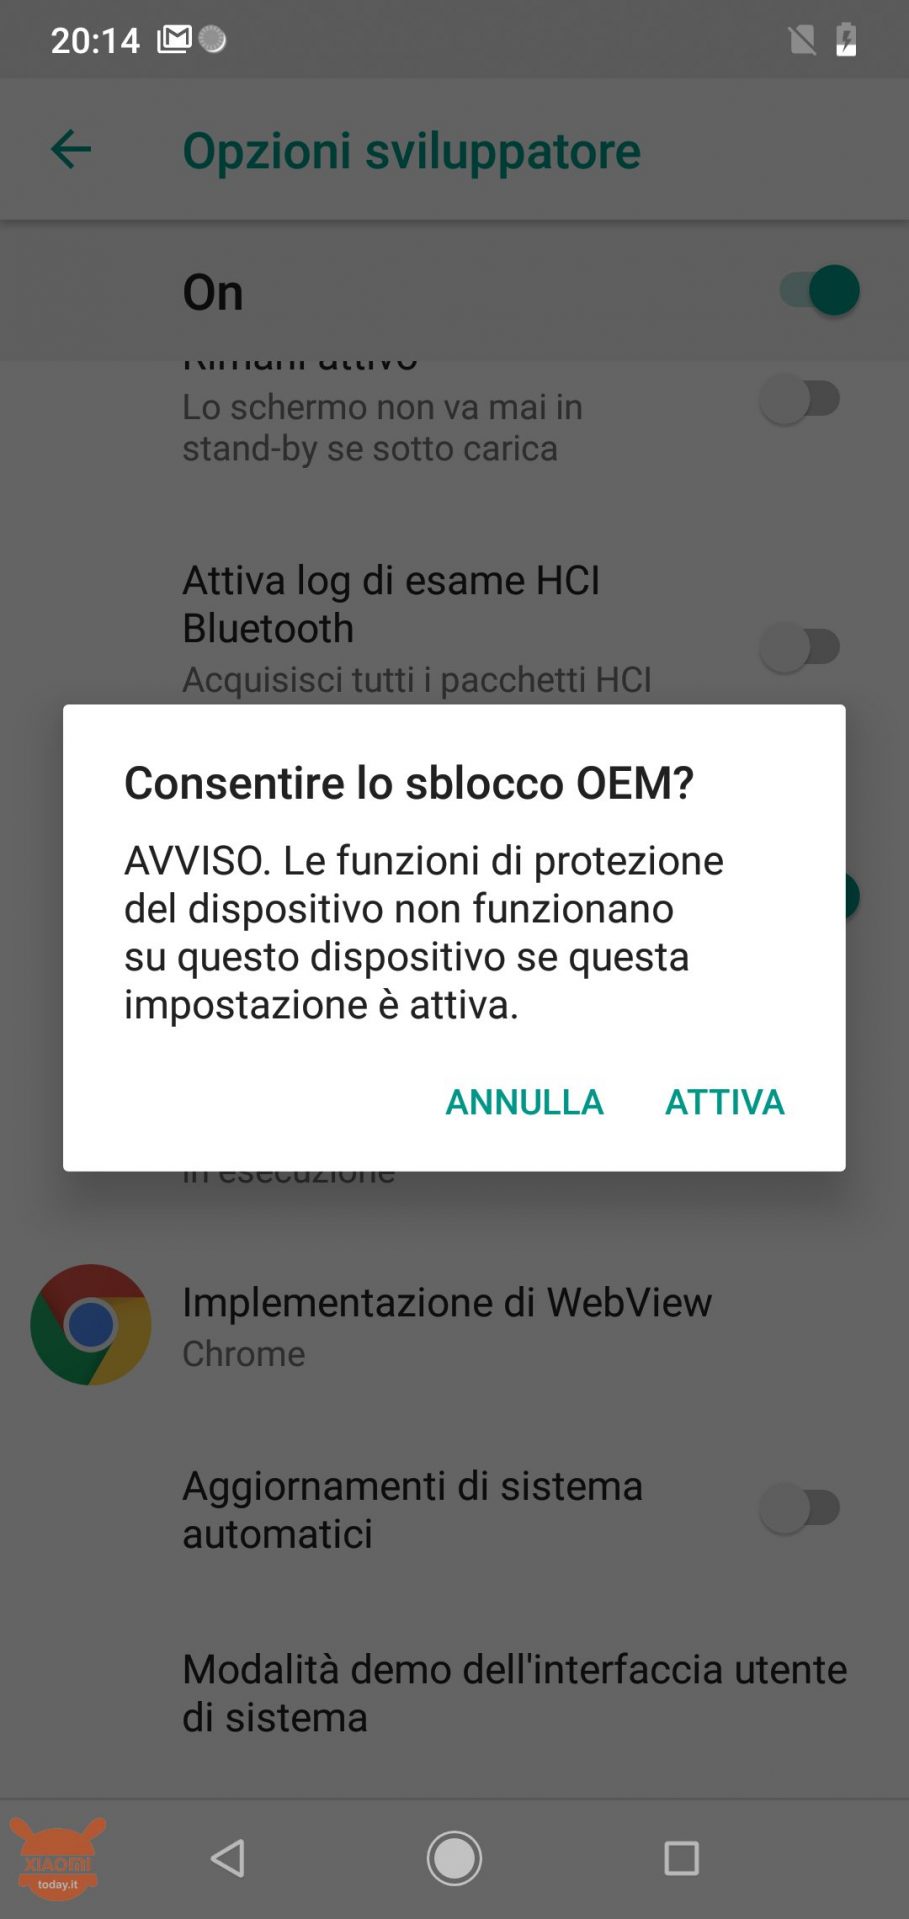
2) Return to the previous screen and enter the Developer Options. Make sure it is activate the USB debug entry and then proceed to enable the option "OEM Unlocking".

3) Go to the folder where the ADB drivers are located (to understand the folder platform tools) and start a PowerShell command window (right mouse button + Shift key on the keyboard at the same time)
4) Connect your smartphone to the PC in file transfer mode and from the PowerShell command window, give the command:
5) If everything is ok, one must appear series of numbers and letters as shown in the image

6) At this point always from the command window write the command:

7) The phone will restart in Fastboot mode (you will see on the smartphone display the MITU mascot icon and the Android robot)
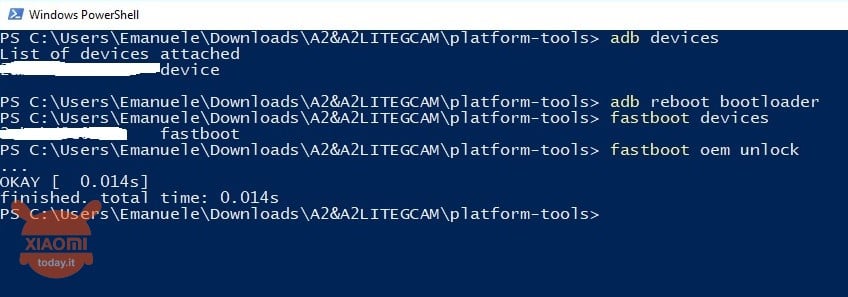
8) always from the PowerShell command window, to see that the drivers are correctly installed and that the smartphone is appropriately recognized, write:
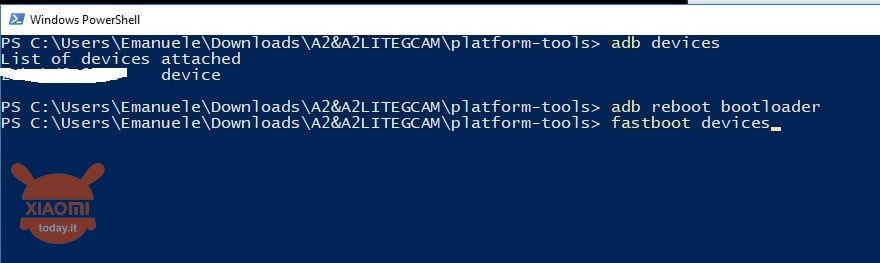
9) You will find there as for the adb command a series of numbers and letters related to your devices
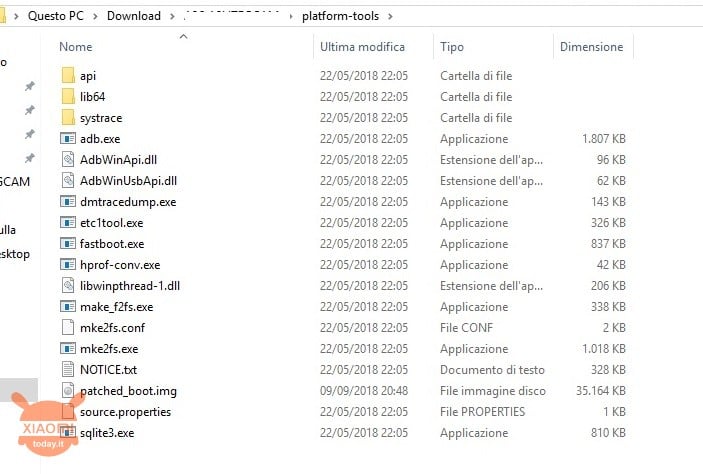
10) Now write the command for unlock the bootloader:
11) The message OK will appear on the control screen the phone will restart, erasing all data and showing one first screen that will warn you that your bootloader is unlocked.

12) now transfer the folder (in our case called lite) previously downloaded (SEE PREREQUISITES) in the internal memory of your smartphone
13) Go inside the File Manager (File) and move to the folder that has just been transferred from the PC

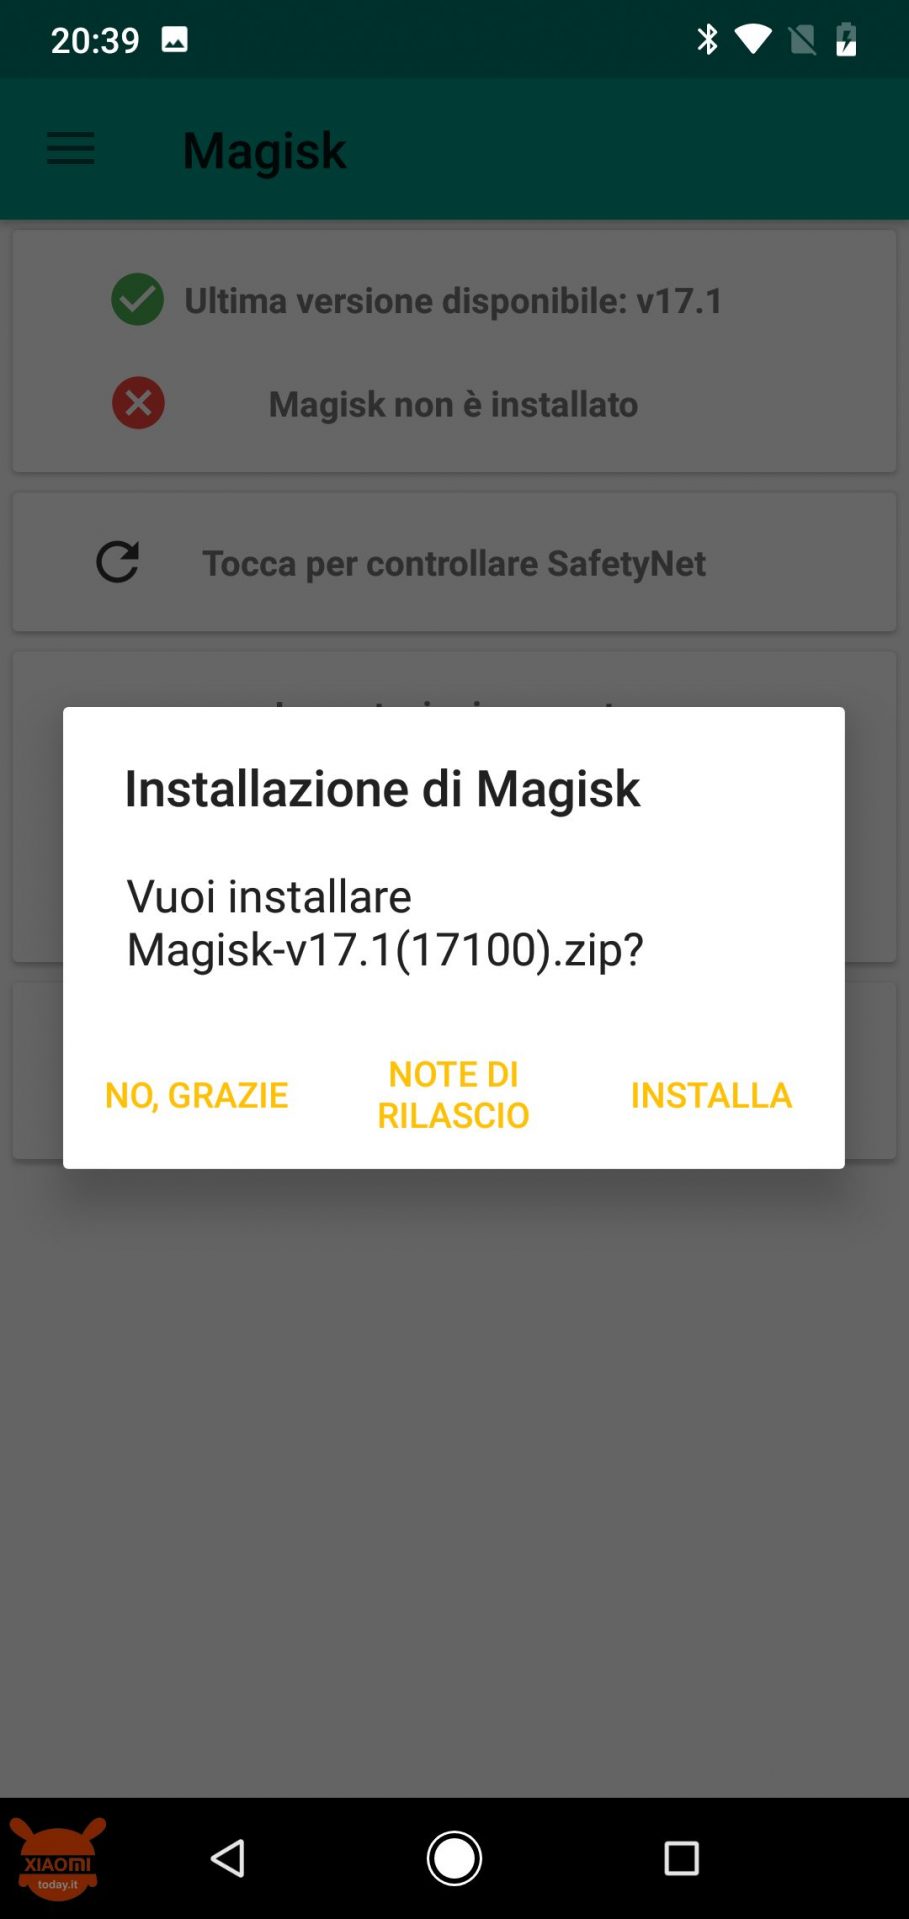
14) Connect to a WiFi network and then provide for install Magisk Manager. Once the installation is complete, start the application
15) The application will ask you to install the latest version of Magisk Manager. Click on Install
16) Restart the application, which will ask you again if you want to install the latest release. Click Install

17) Now you will be asked if you want to download a zip file or if you patch the boot image. Choose the second option

18) You will be asked to choose the file boot.img that you have previously copied within the folder transferred to your Mi A2 Lite
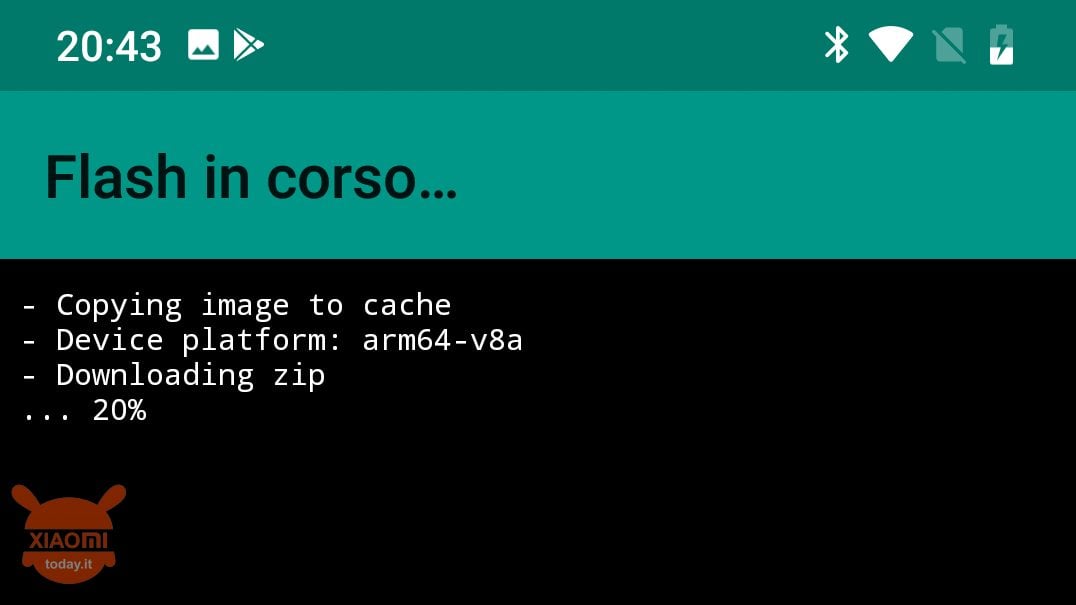
19) Now a Magisk application screen will start in which a series of writings will appear. Wait until the All done!
20) now transfer the patched boot file to your computer (find it in the download folder of your Mi A2 / Mi A2 Lite) ed insert it into the platfoorm tools folder
21) Reopen the PoweSshell command window that you had already opened earlier
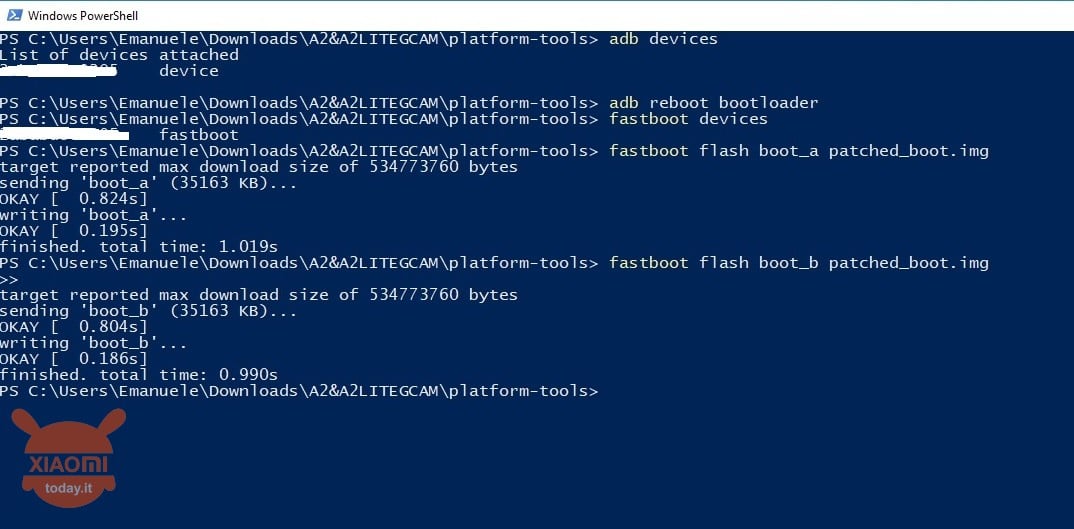
22) Now write the command again adb reboot bootloader (always check that the device is recognized as explained above)
23) The phone will restart in fastboo mode againyou from the command window check that the smartphone is recognized typing the command fastboot devices
24) Now you have to write the following command:
25) The will appear written OK and then type the following command again:
26) Restart the smartphone by writing the command:
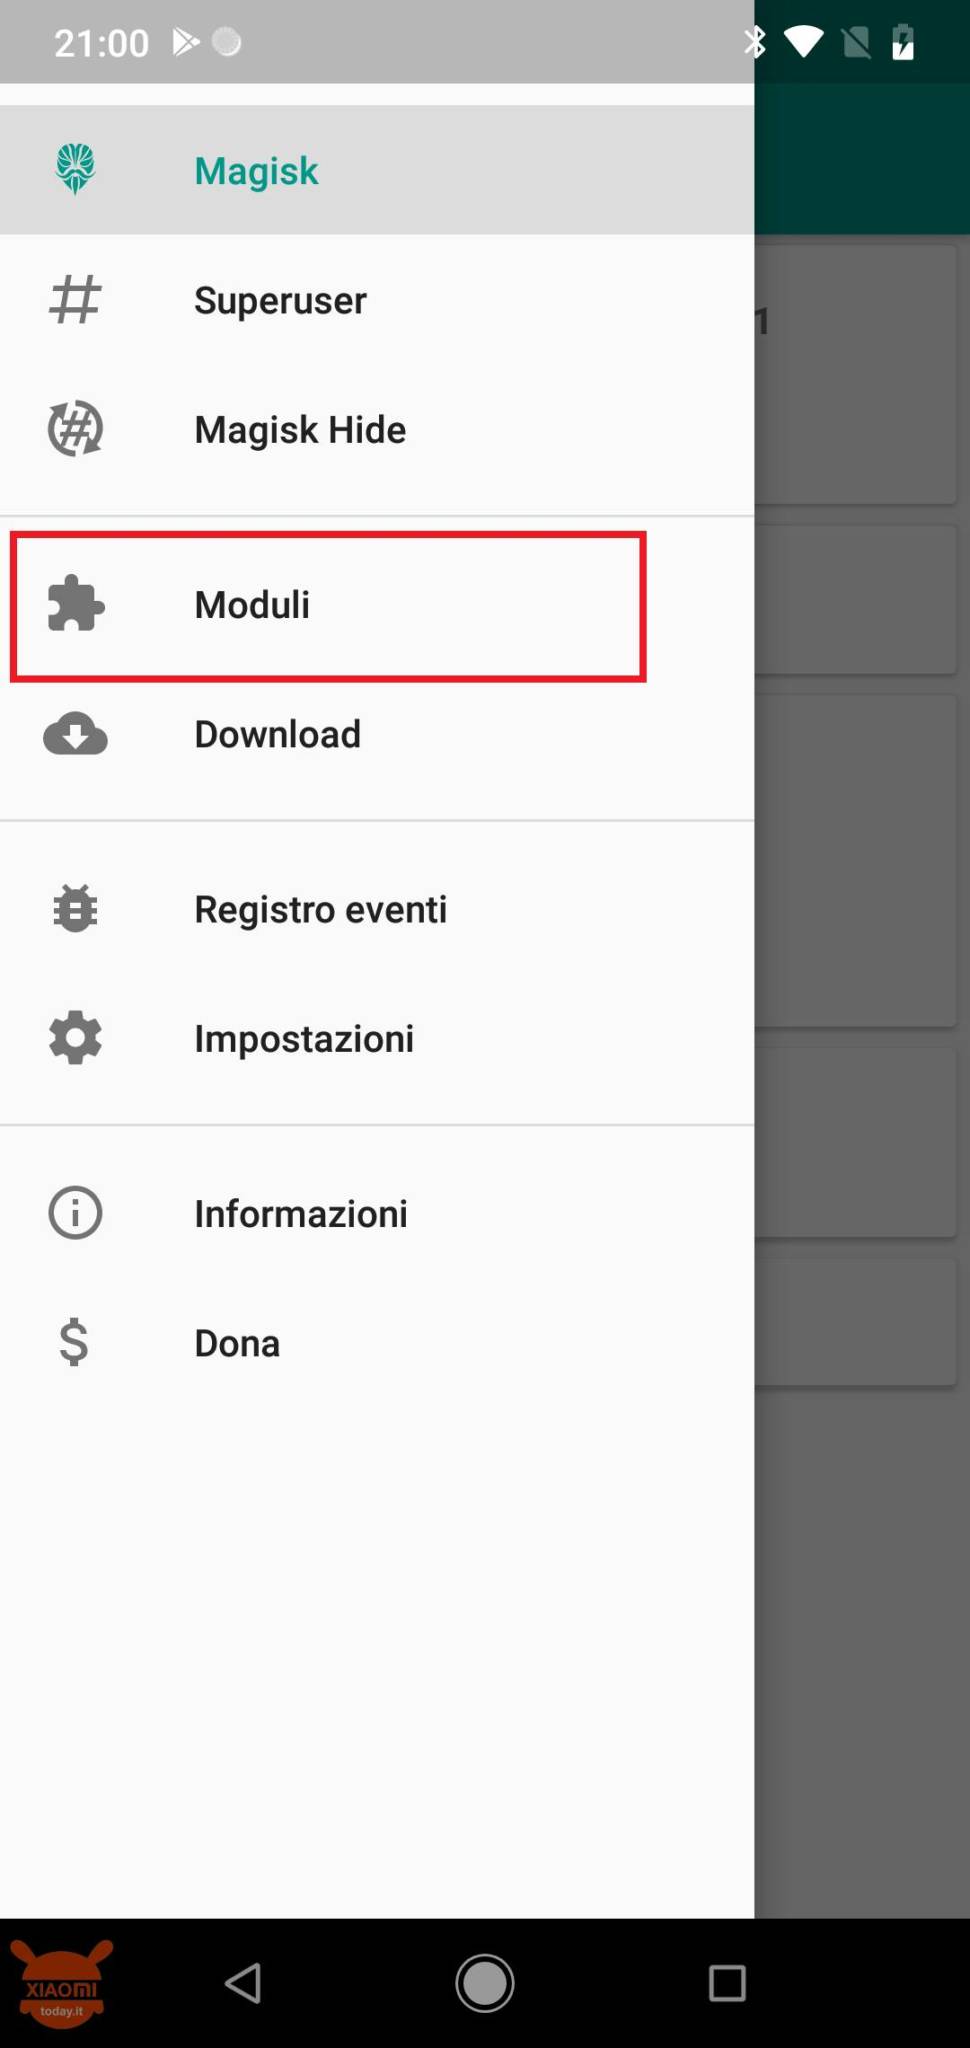
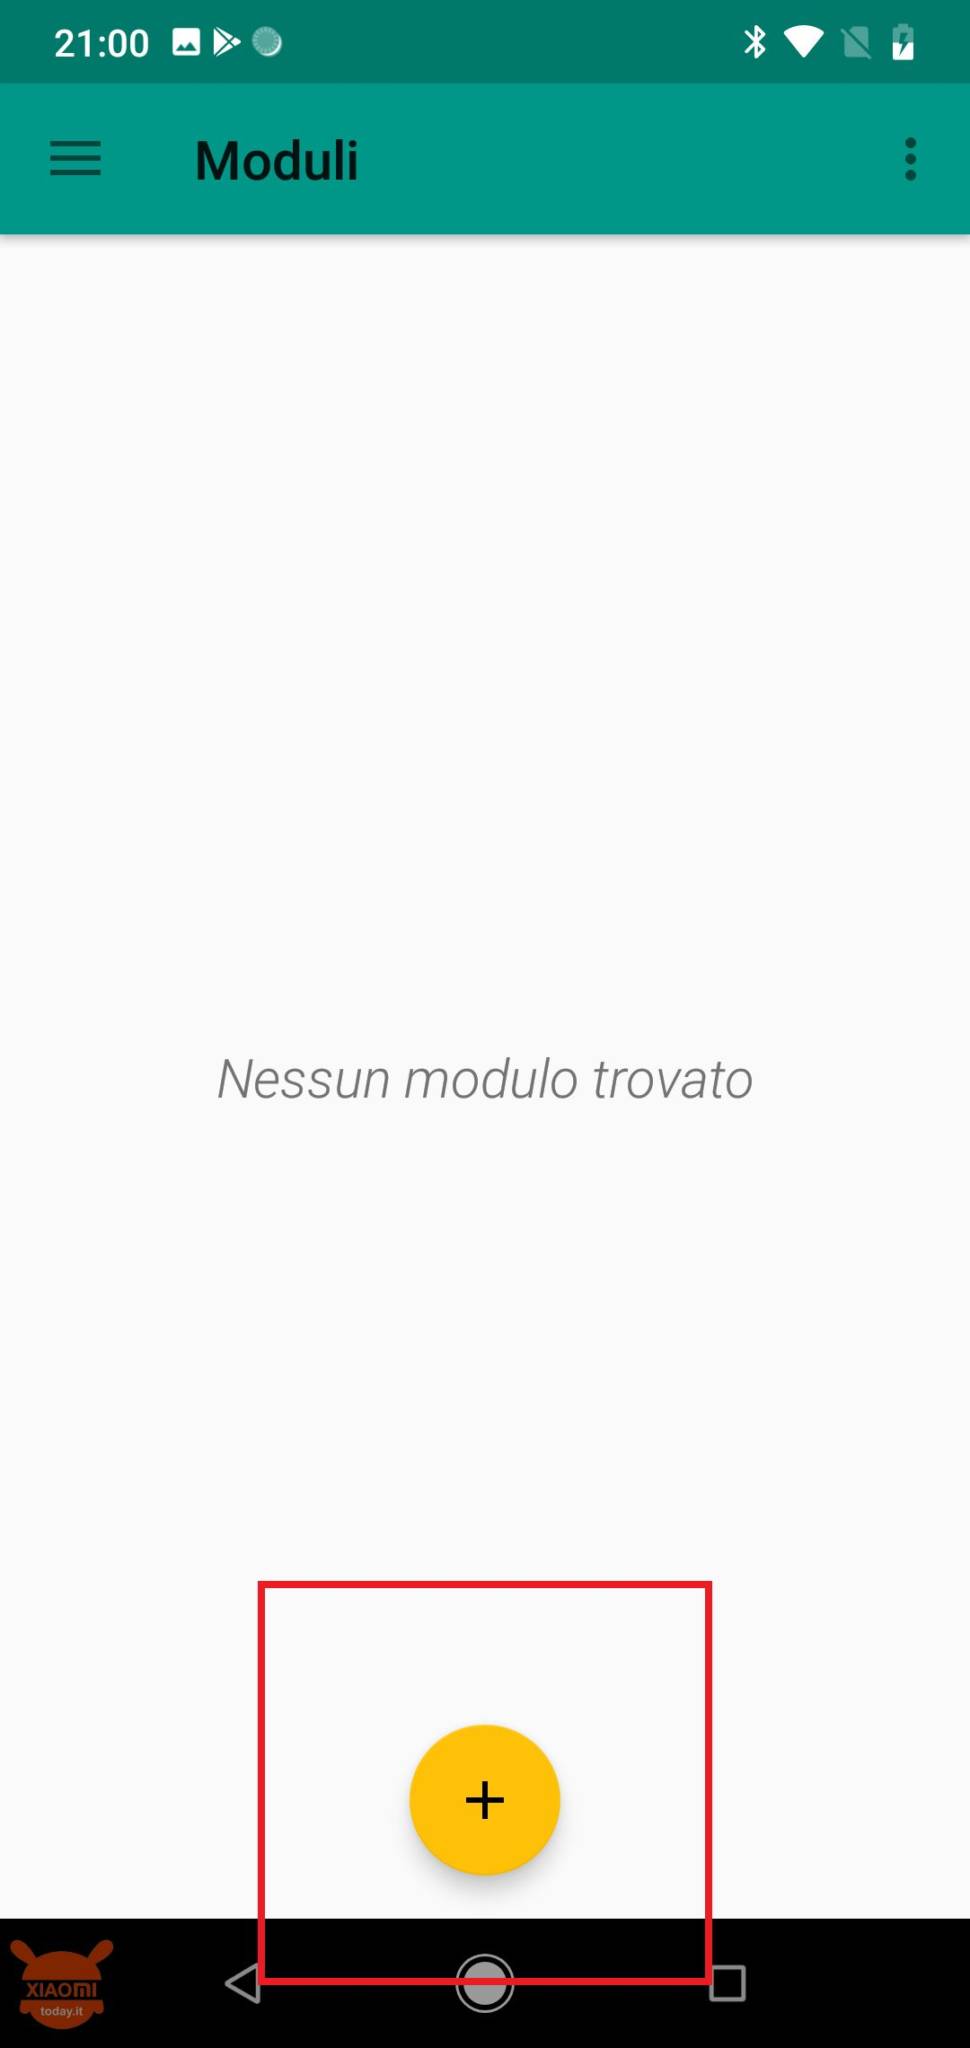
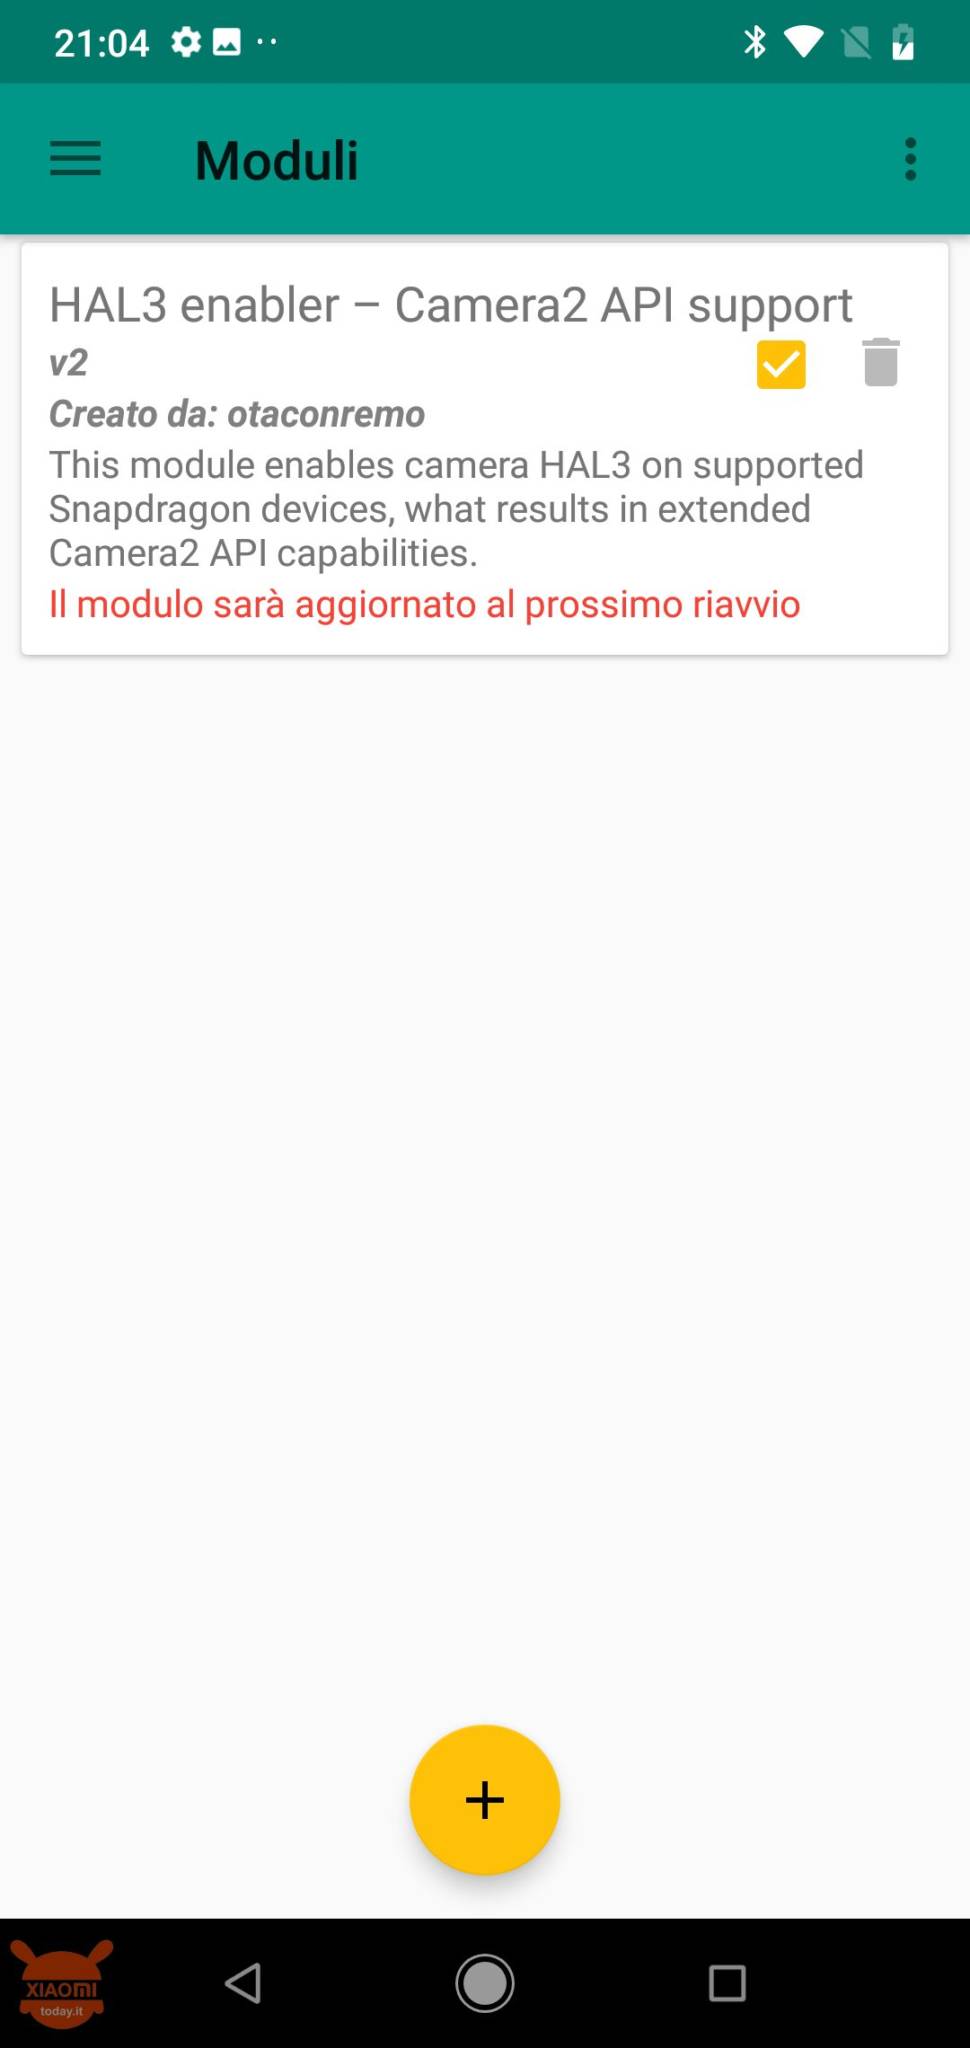
27) Once your Xiaomi Mi A2 / Mi A2 Lite has restarted enter the Magisk application and subsequently entered in the menu related to the modules (the menu can be found by clicking on the three lines at the top left)
28) Click on the + symbol at the bottom and go to the folder previously transferred to the smartphone's internal memory and choose the preferred form (standard or with slowmotion ability)
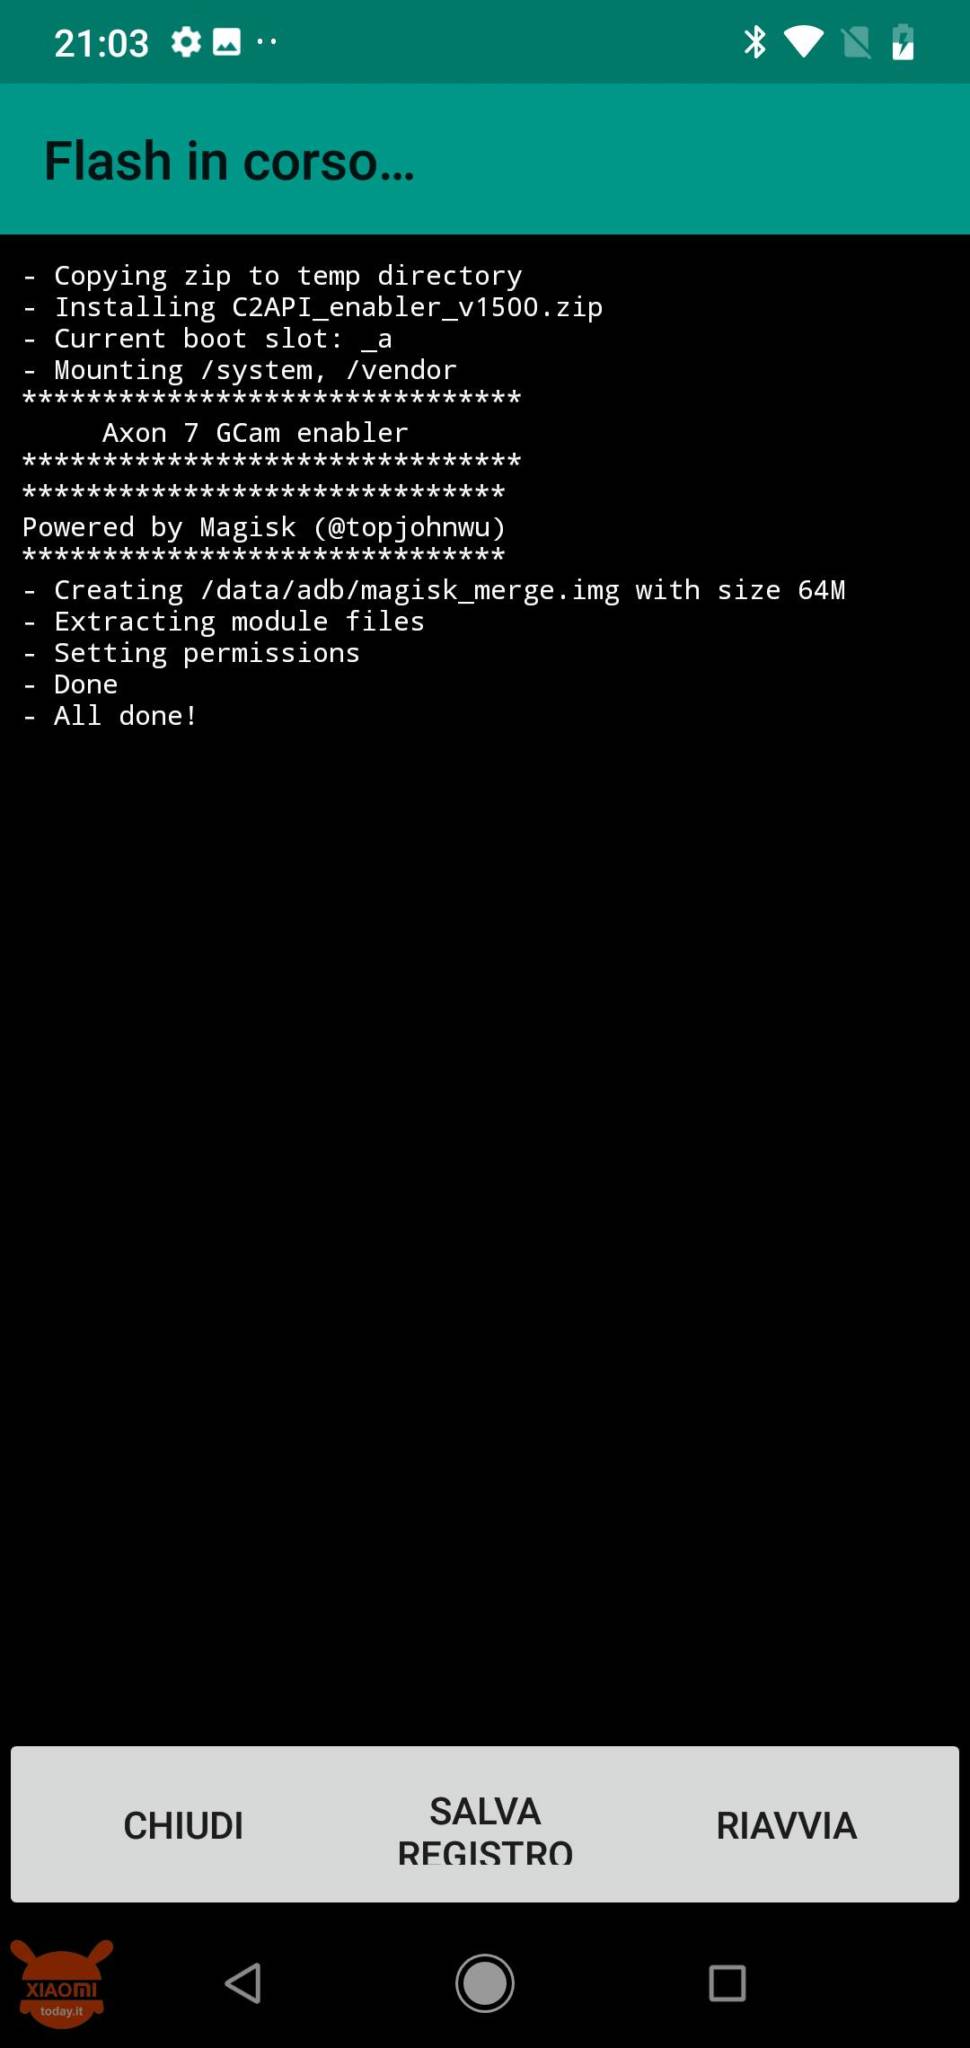
29) The installation of the module will start now will enable the cam2api on your terminal. After the installation click on close and restart the smartphone
30) Now transfer the apk file of the google cam of your choice, in my case the 5.1.018 of the Arnova and install it as you would with any apk file
RECOMMENDED PARAMETERS FOR A BETTER USE OF THE GOOGLE CAMERA
Finally, the parameters that I recommend to set by setting the GCam moddata, for a better user experience, are as follows:
- config camera hdr + = nexus 6 car
- model = 2xl pixels
- hdr + parameters = very high
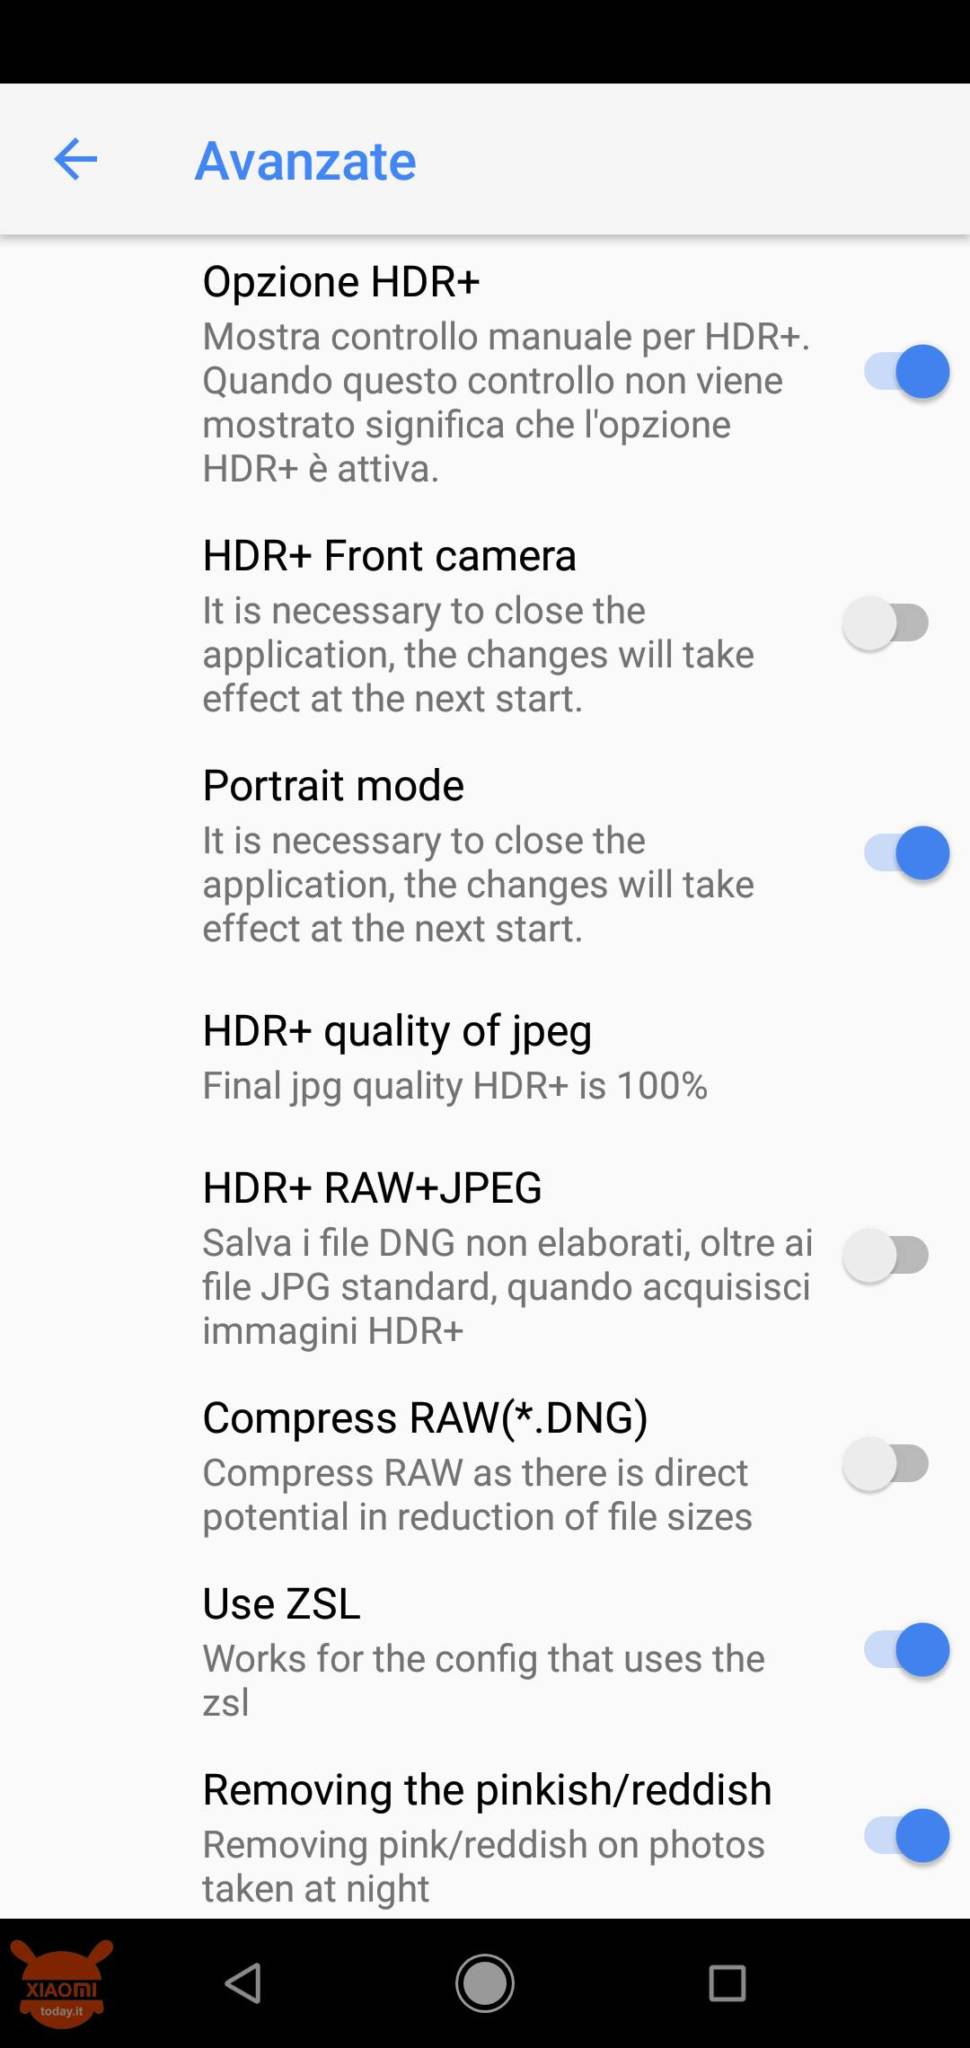
From the advanced settings menu, activate the following items:
- hDR +
- portrait mode
- hdr + quality 100%
- zsl
- removing the pinkish / reddish

AND OTA UPDATES?
Are you wondering if this procedure still allows you to receive OTA updates on your Xiaomi Mi A2 and Mi A2 Lite? On the other hand, one of the reasons why you have opted for this smartphone is support for constant firmware upgrades for Google's 18 months, so you do not want to give it up. Well you can stay quiet, you will not lose the OTA but you have to continue as follows:
- After the procedure described above deactivates the automatic OTA, to avoid possible problems, by going to Settings - System - Developer Options and remove the check from the item Automatic system updates;
- At this point you will no longer receive OTAs automatically but you will have to proceed manuallySo when you know that a new OTA is available, go inside Magisk Manager - Uninstall - Restore images ma very important do not restart the phone;
- Close Magisk Manager and go into Settings - System - System Update e install the OTA;
- Once the update is finished the system will ask you to restart the phone: do not do it! Open Magisk Manager instead and go to Install - Install in the inactive slot (after an OTA);


I don't understand the insistence on the need for a Windows PC… They are all common adb / fastboot commands. The real Linux PC is definitely better
Chyba se kuźwa jaja robicie że trzeba tyle rzeczy zrobiÄ ‡. Masakra. Dobra to nie mam camera google.
The link to download the boot.img is not available. Where do I find the one from mi a2 for the V10.0.16.0 version? Does the warranty fall if I don't activate the root?
Buenas, no reconoce el fastboot devices, se reinicia mi celular como normally se reinicia… Que debo de hacer? 🙁
esse process é feito depois de ter feito o root?
Good evening, thanks for this guide, I would like to know if from the date of publication to today some procedures for installing the gcam have changed and if the files needed for it are still valid with android 9. Thanks
Kalao untuk mi 6x sama ga
Eu não run fazer or command "fastboot flash boot_a patched_boot.img" na tarefa 24, ele aparece:
Error: cannot load 'patched_boot.img'
O que eu faço?
Hi! I followed the guide, but unfortunately I missed the last part and after installing the GCam I updated to Android 9, consequently the camera no longer opens. Is there a way to not repeat the whole procedure from scratch without losing the data? Thanks!
I have the a2lite for a month and I am finally going to want to exploit the camera more and then use the "stock" one I know that you have to unlock the bootloader, have the root and then activate the "camera2api" and then be able to install the moddata gcam I state that I updated to android pie - bootloader unlocking is simple, fastboot etc eom unlock .. - now I have to root otherwise no api2 so I read that the best solution is magisk ce all the guide to do this root (even with android pie right?) and then I install the gcam ... and after ?? of... Read the rest »
Hi, once the procedure is over can you re-lock the bootloader or is it better to leave it unlocked? Thank you
Hello everyone I have successfully carried out the procedure on my A2 Lite I have some problems with the app installed, above all it does not take the photo in portrait mode with the front camera (or rather if I then go to Google Photos I find a completely gray photo . I tried to install the most up-to-date version of Arnova but the problem persists. I also noticed that the app icon with a progress bar that does not start mail often appears in the notics. Can you help me? Thanks
hello, on xda find a guide for the miXXUMUM lite where they suggest to use GCamera_Mod_v.2_R5.1.23Plus_fix_crash, to avoid crashing with the front cam, but I have not yet tried, I'm waiting to receive the phone. Find the guide at the following link, I hope it will be useful: https://forum.xda-developers.com/mi-a2-lite/how-to/guide-enable-camera2-api-install-google-t3846264
Why flash the patched_boot in both slots? It does not make sense! Just even start the phone temporarily with the patched_boot WITHOUT flasharlo and so the OTAs are preserved!
So how would you recommend doing to restart the temporary root phone? After the 23 point which command should you insert? Let me know
Kudos to the excellent guide! Just one question, I installed the module with the option for Slow Motion but the installed Gcam crashes when I select this option, can it be solved?
On some models it seems to work, on other models it doesn't ... in any case the Google camera works wonders for photos, so for motion pictures it uses the stock camera
Slow Motion does not work with any version of the Google Camera. It seems that developers can not make it work on non-Pixel devices.