Three days ago we broke up on one overview of the new Xiaomi Multi-function Gateway while we now look at a little bit of the issue by showing them both a short unboxing and the first steps to make the Gateway operational.
As for the sales package, as usual Xiaomi wanted to keep it minimal. On the other hand, inside it is not that there are many accessories. In addition to the Xiaomi Multi-function Gateway, there is only the classic paper manuals and a very interesting accessory: a sensor for temperature and humidity.
Once everything is unpacked, what are the first steps to make the product in question operational? They are essentially three:
- Connect the Xiaomi Multi-function Gateway to the power supply and hold down the Power button to make it enter "Discovery" mode;
- Download the Mi Home application and select the option "Add a device";
- Once our smart device is added, everything will be ready.

At this point we can set all the various parameters of the hub, such as the intensity of the luminance of the LED bar, or its coloring, or set alarms, etc. From this screen it is also possible to access online radios (unfortunately only Chinese) to listen to in complete freedom.

Xiaomi Multi-function Gateway and the addition of new accessories
The real task of the hub, however, is to manage a whole series of accessories that allow us to make the home smarter. Take for example the humidity and temperature sensor that we find inside the sales package. The pairing procedure is very similar to the one we followed previously:
- From the Home Home menu, select the "Add subdevice" option;

- Select and turn on the sensor you want to add;
- Hold down the power button of the hub to get it into "Discovery" mode;
- Once paired, customize the name and environment in which we need to position it.

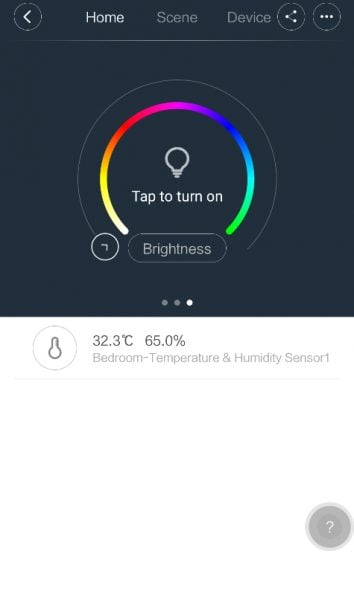
Once set up properly, we will find the data from the various accessories coupled directly to the home screen. Tapping on them will open a screen that will show them in detail.
Article Xiaomi Multi-function Gateway: unboxing and first steps with the Mi Home app seems to be the first of Xiaomi Fans Italia.
via | Xiaomi Fans Italia


Congratulations for the article, I just yesterday took advantage of an offer on GearBest where I got the Xiaomi Mijia Smart Multi-functional Gateway WiFi Remote Control Upgrade Version for 23 euros. A few questions: 1) are the aqara sensors compatible or should you only use Xiaomi Mijia? 2) the sensors are powered with button batteries and how is the camera powered? 3) does everything revolve around the home wifi router? (if they cut off the current everything is unusable?) Thanks in advance for the replies bye Vittorio