We have from poco had the honor and the good fortune to try Redmi Note 9 Pro, a smartphone that at an affordable price offers practically everything you could want from a modern phone, but what perhaps turned out to be subdued was the photographic sector and its yield, excellent when compared to competitors who populate the mid-range of the market but out of line for what the integrated sensors can actually perform. Fortunately, one of the many GCam mods is available to excite us, which in many cases improves the photographic situation of the many devices on which it is possible to install it. Could we not try it? Of course not and so here is a guide on how to install it and the results obtained compared with the stock camera of the Redmi Note 9 Pro.
GCam on Redmi Note 9 Pro: here's how to install it and comparison with stock camera
The procedure that we list, moreover, fits perfectly with many other smartphones of the Xiaomi / Redmi brand and therefore could be useful in the future, except for the version of the GCam that you are going to install, given that there are several developers and dedicated to different models , with different CPUs. Having said that, for our Redmi Note 9 Pro we opted for the GCam version perfected by Maneesh Kumar that you can download by clicking on the button below, as well as download the configs file (further button below) which will serve to optimize the various settings of the GCam Mod. The configs file as well as the version of the GCam are also compatible with the younger brother Redmi Note 9S. You can download directly from your smartphone.
CONFIGS FILE GCAM 7.3 REDMI NOTE 9 PRO
Read also: Redmi Note 9 Pro review
Once downloaded the two files that will have name GCam_7.3.020_4th-form.apk e onfire-4thform-maneeshkumar75 [1] .xml (you should find them inside the Downloads folder of your device) you can click directly on the apk of the GCam just downloaded and proceed with the installation of the same. You may need to grant permissions to install content from alternative sources to the File Manager if you have not previously granted them. After the installation at this point you can verify that the GCam works without crash but to optimize it to the best you have to follow some steps to apply the previously downloaded configs file.
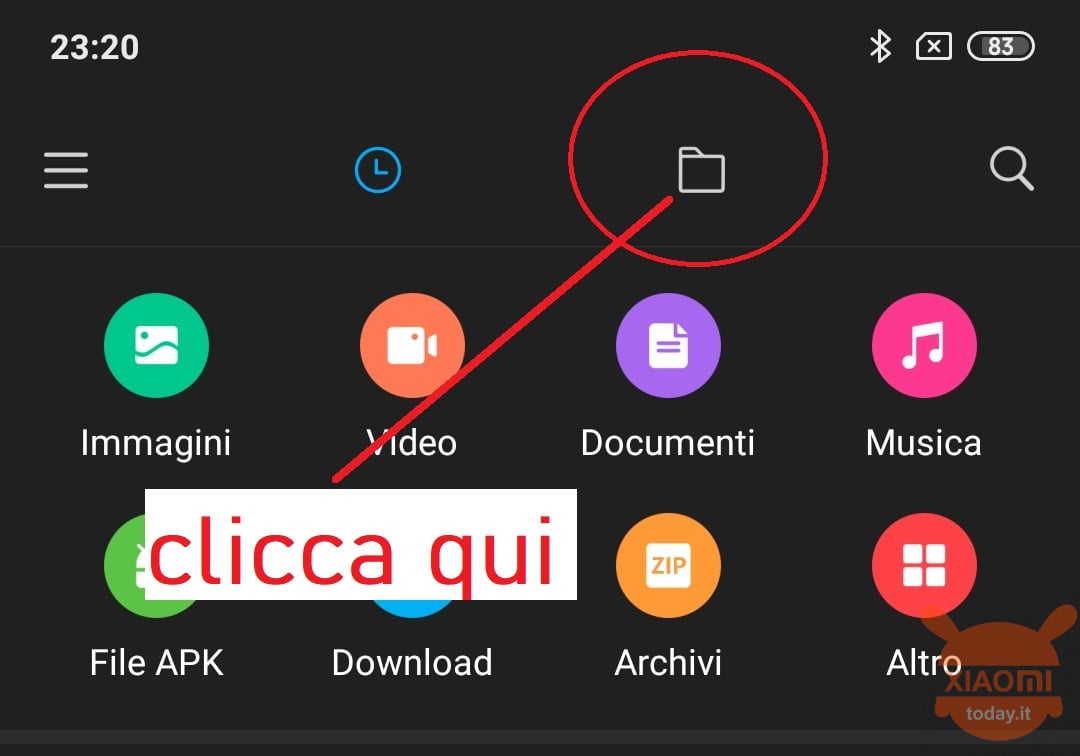
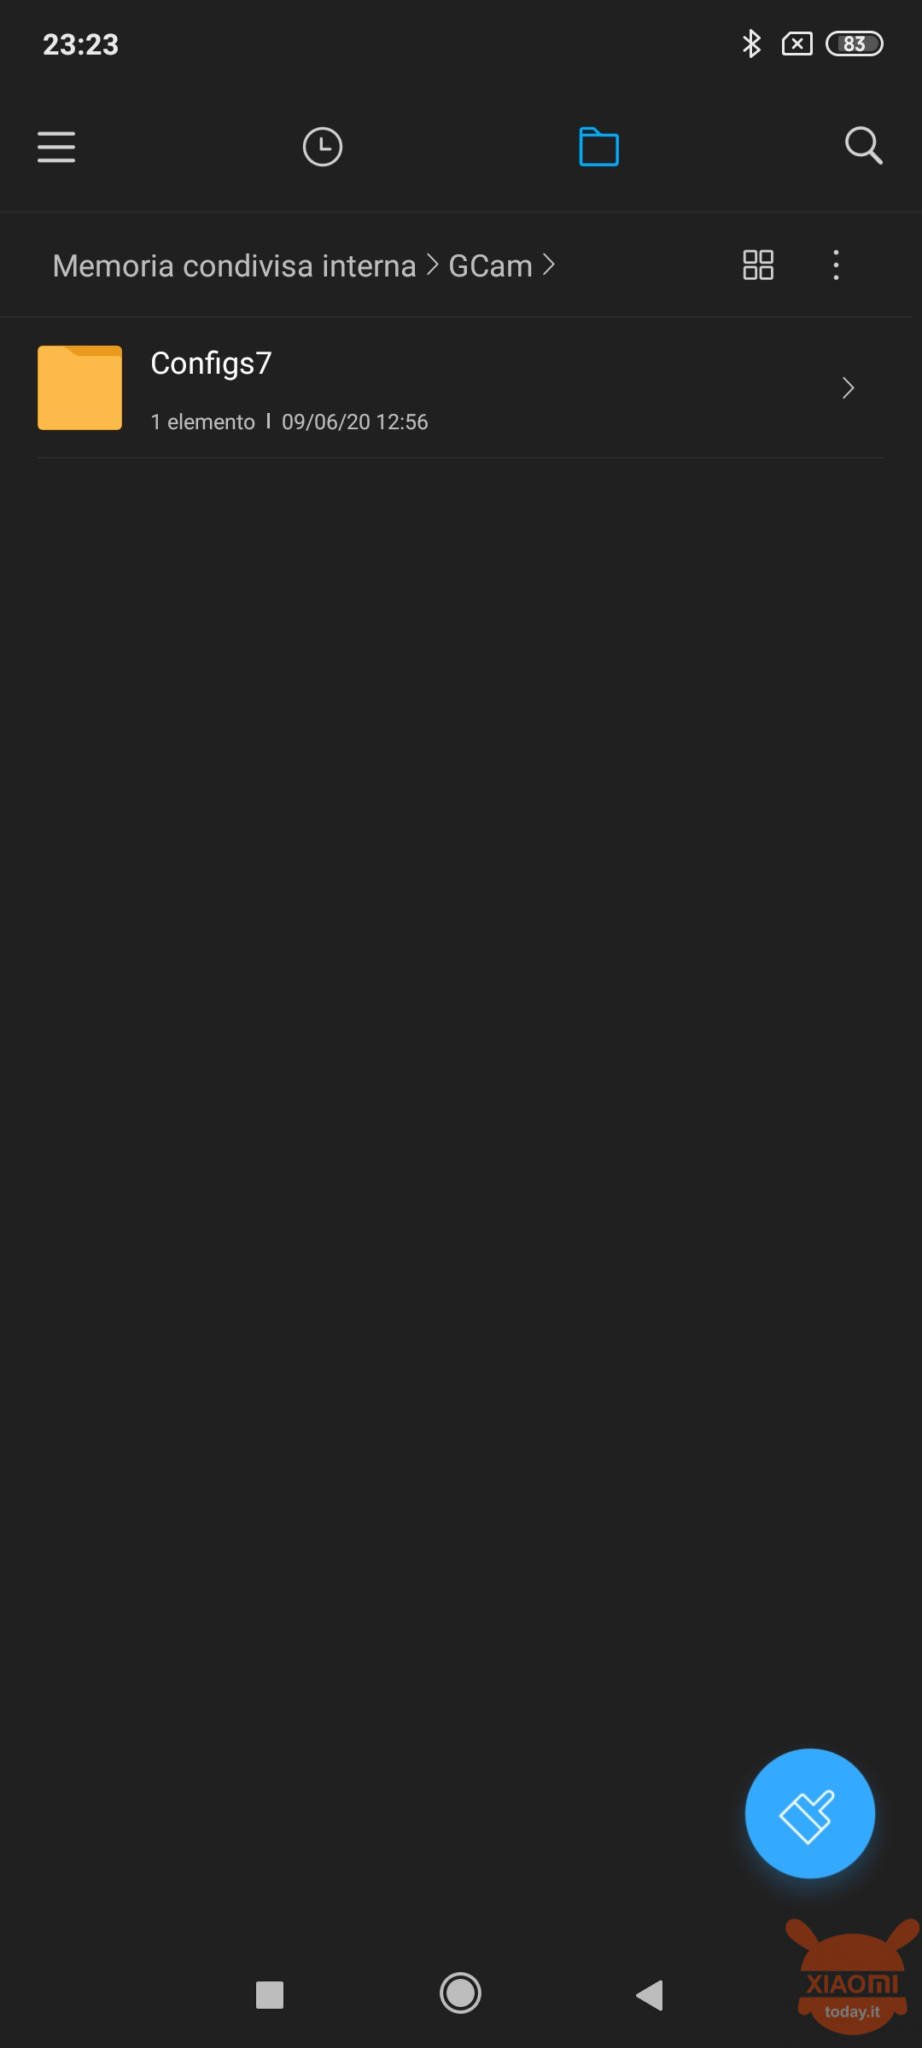
- Go to File Manager;
- Click on the folder icon at the top;
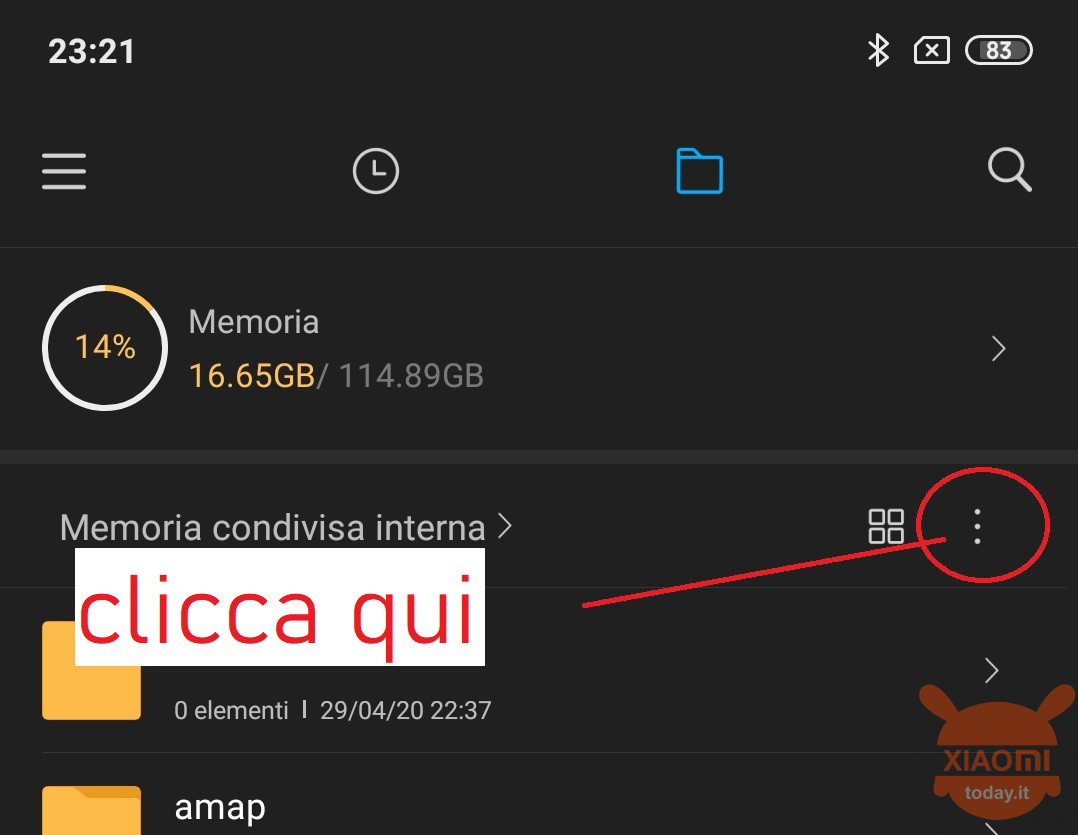
- Click on the three dots next to the 4 squares symbol of the Internal Shared Memory item;
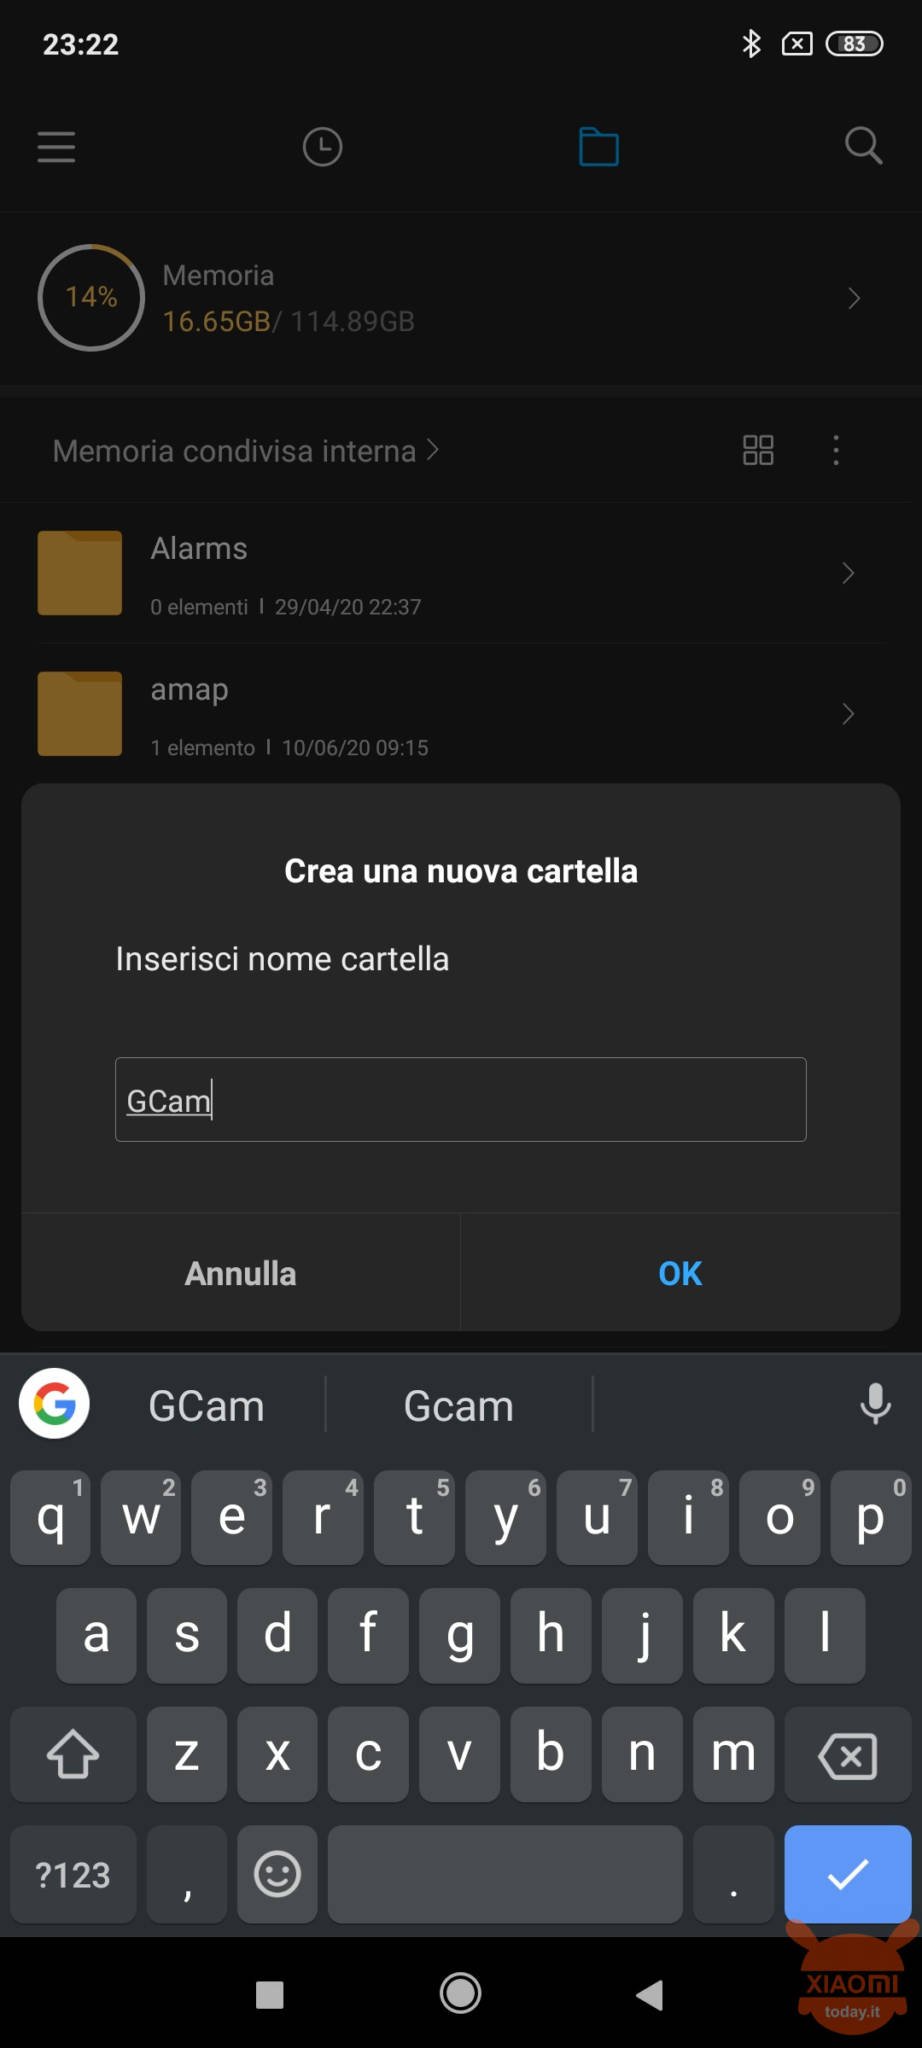
- Click on Create a new folder;
- Give the name GCam;
- Inside the newly created GCam folder you have to create another one, with the same method just described and name it Onfire. Inside this folder you have to create another one and name it Configs7;
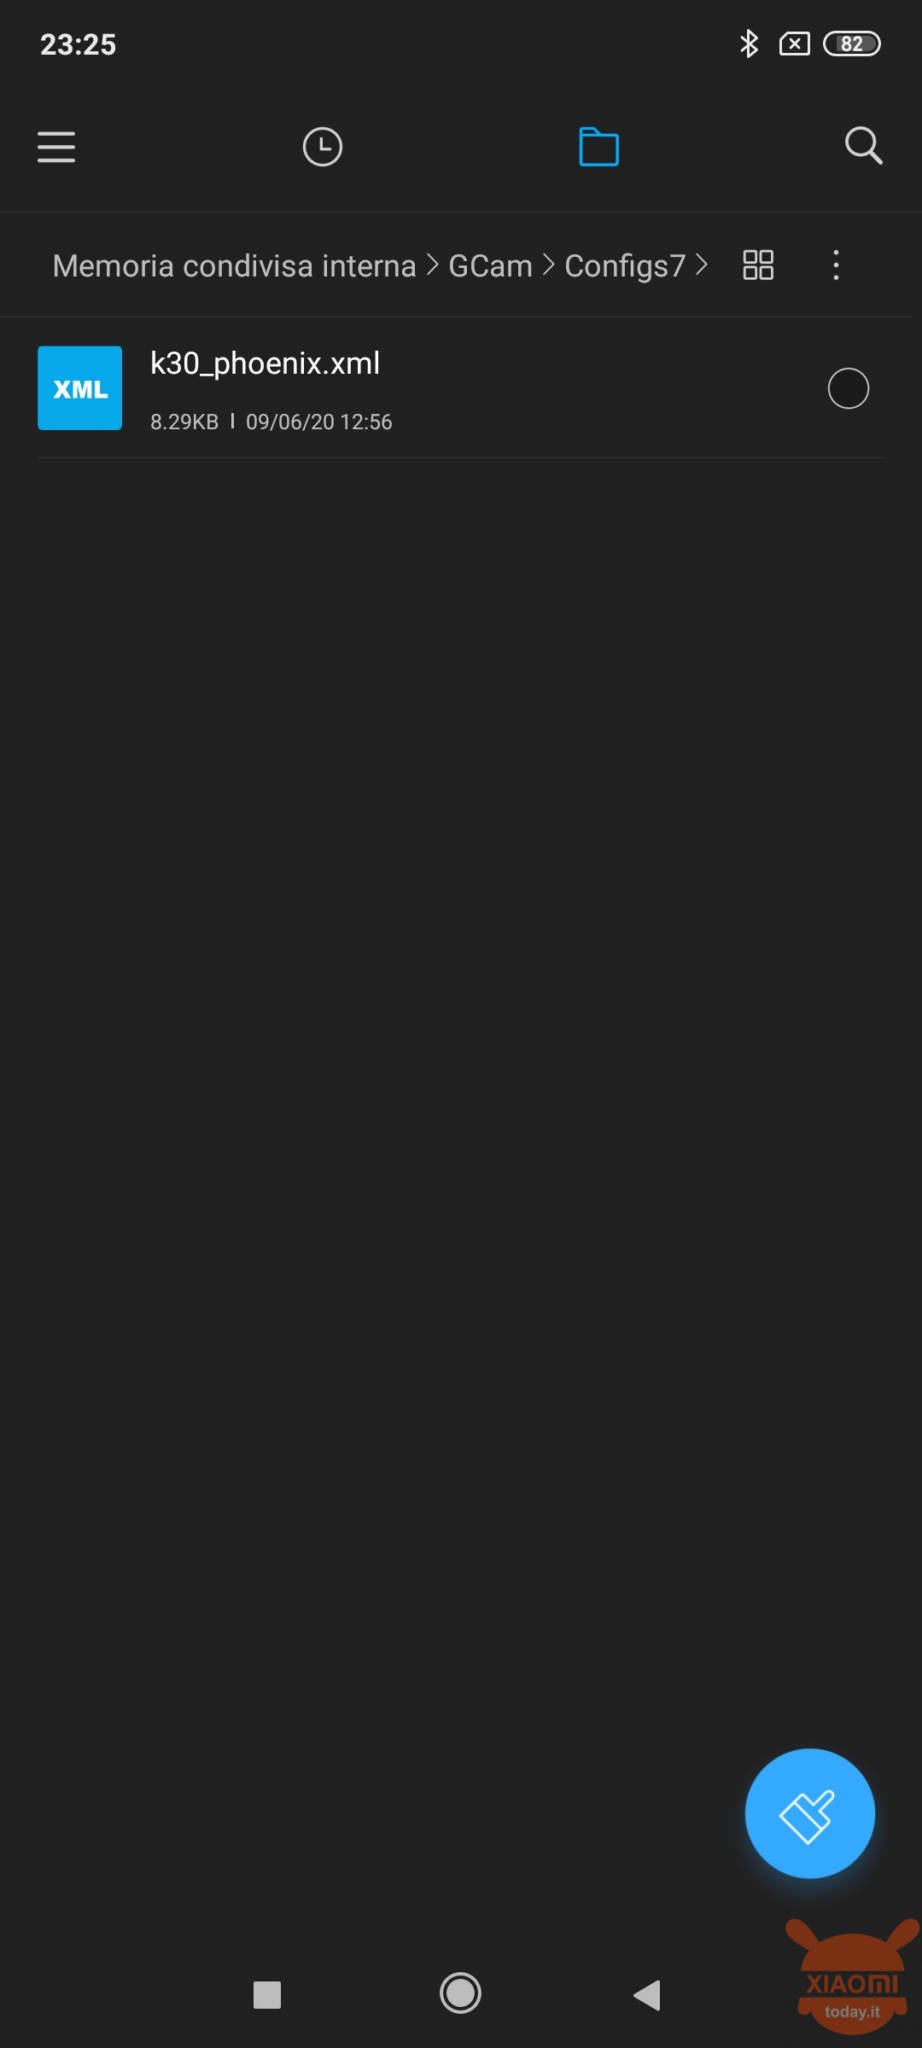
- Now you have to move the onfire-4thform-maneeshkumar75 [1] .xml file (which you should find inside the Downloads folder) inside the Configs7 folder;
-

- example taken from POCO F2 PRO
-
- example taken from POCO F2 PRO
-
- example taken from POCO F2 PRO
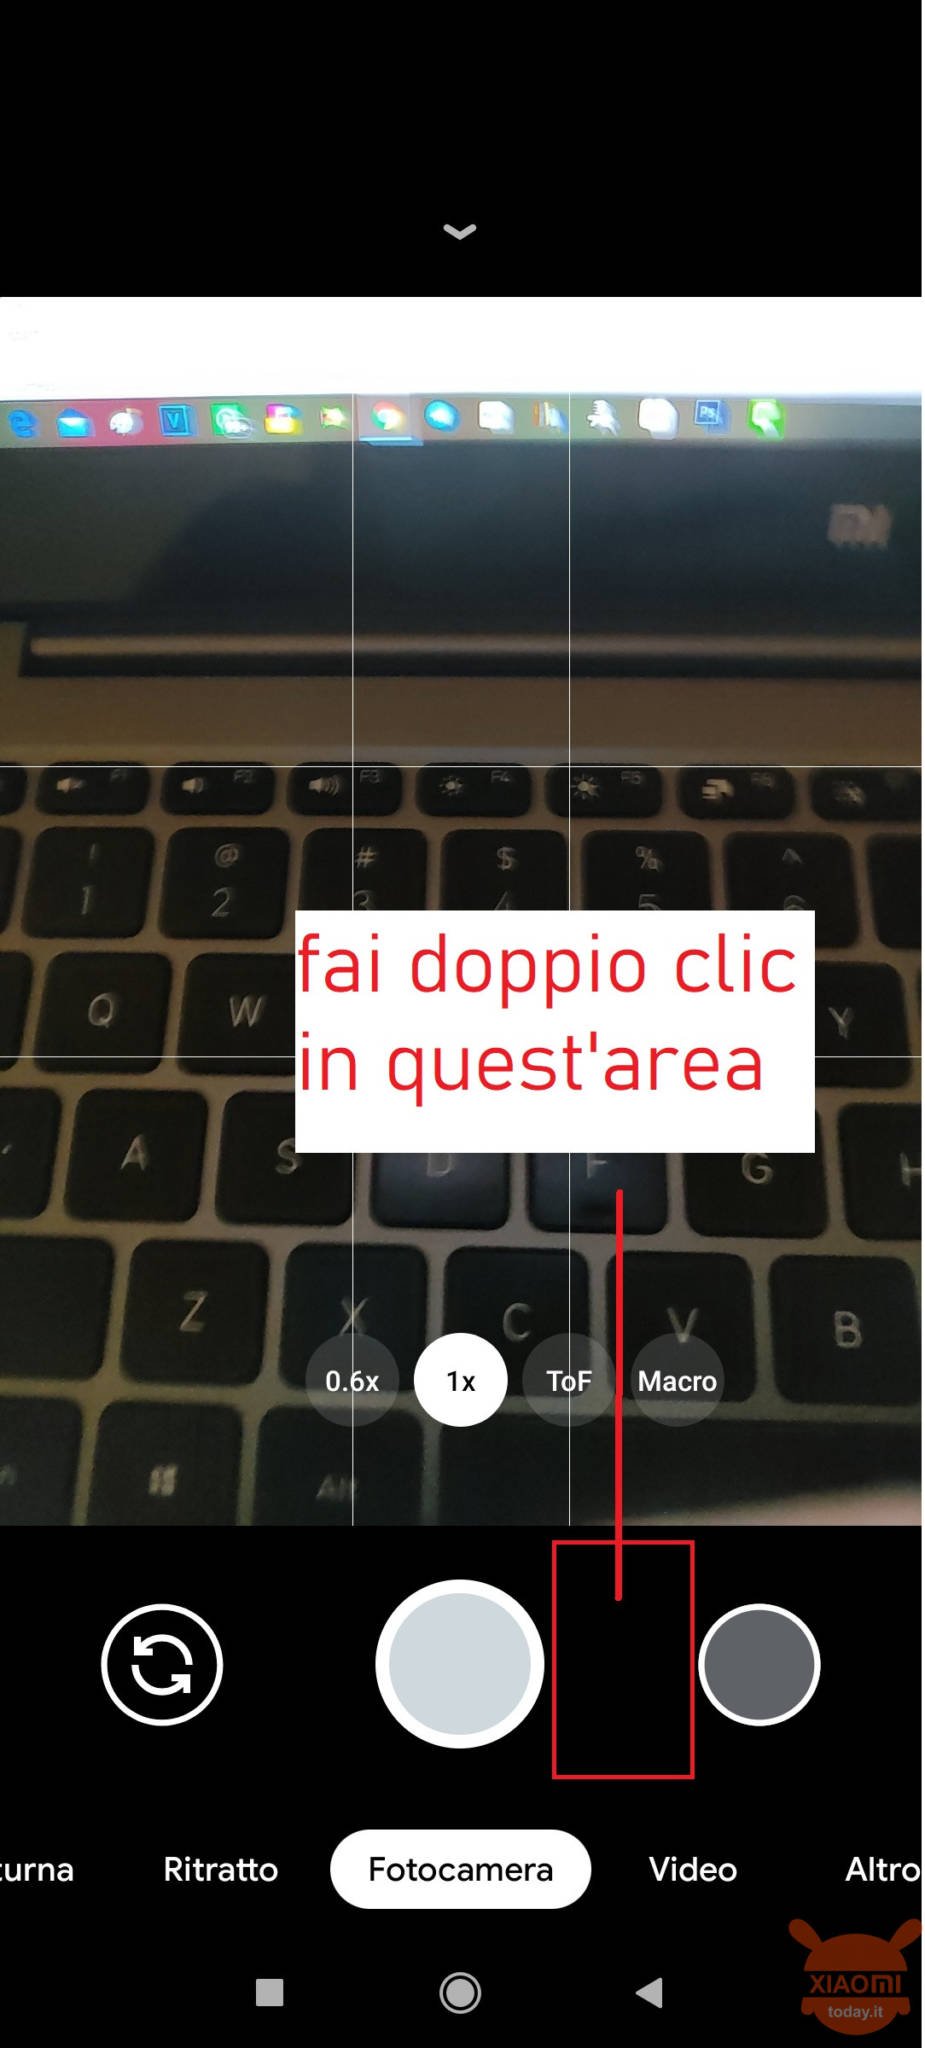
- At this point the GCam app and double click on the black part next to the shutter button;
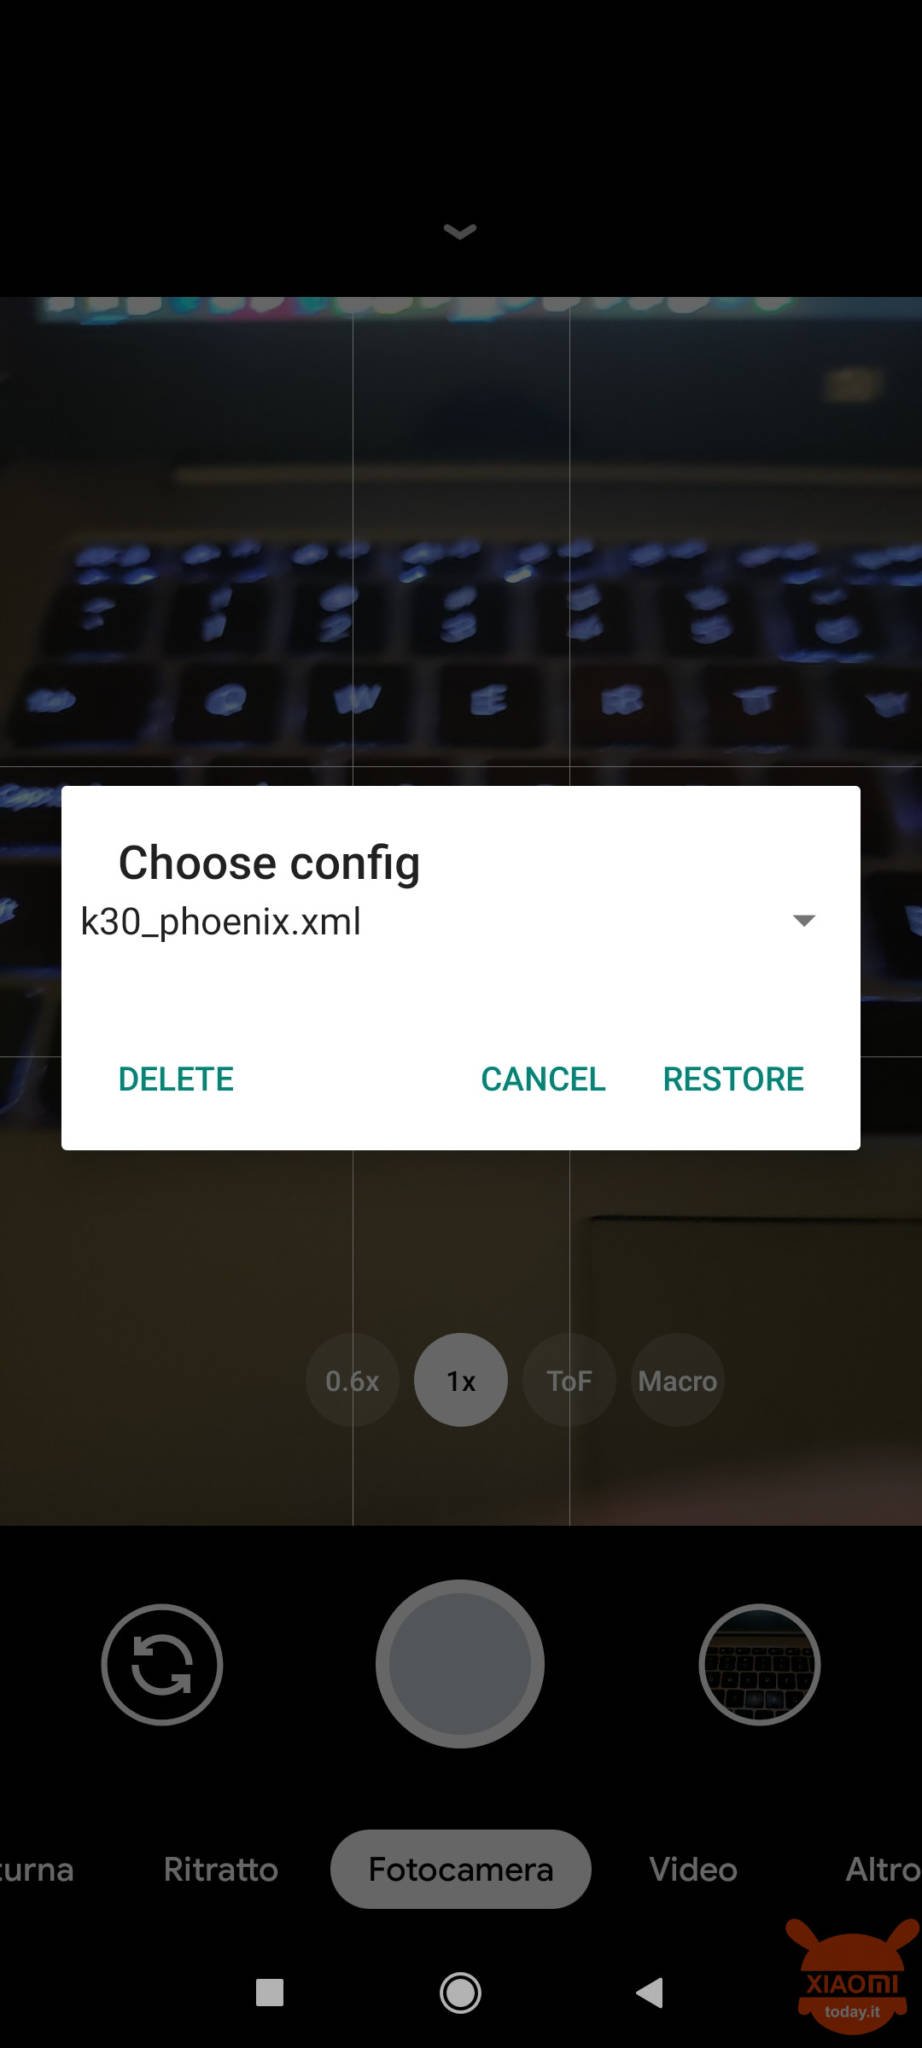
- A window will open in which you will select the newly loaded configs file. Now click on RESTORE.
-

- example taken from POCO F2 PRO
-
- example taken from POCO F2 PRO
The time has come to compare the potential of the GCam compared to the performance of the Redmi Note 9 Pro stock camera. In natural lighting conditions the comparison is a clear advantage of the shots obtained by the GCam, giving more real shades and above all they are better defined all the details of the framed subject. Just look at the photo of the purple flower, for example, where the color tone is warmer and less washed out and above all the light reflections on the petal are also perceptible. Even the white balance in general is in favor of the GCam, as in the photo of the dog, where what is stated is evident and above all the definition of the details is clearly visible. At a glance the floor immediately gives us the perception of the quality impressed by GCam. In the panoramic photo the results seem to be quite similar, but zooming the image you can notice the greater richness of details and sharpness in favor of the GCam.
[s201_bai id = "51 ″]
[s201_bai id = "52 ″]
[s201_bai id = "53 ″]
[s201_bai id = "54 ″]
Analyzing the shots taken in macro mode, the differences between the two camera apps are marked a lot, to the clear advantage of the MIUI camera app. For example, you can see on the photo with the writing with a blue background, that the GCam is unable to calibrate the white point well, returning a sort of haze tending to blue, as you can see in the photo of the coins, where the brown table looks almost become celestine. Overall the details are good for both software but for Macro shots it is better to rely on the stock software.
[s201_bai id = "55 ″]
[s201_bai id = "56 ″]
In the case of selfie shooting, the criticalities of the proprietary software all come out, as the skin tone is not realistic, always presenting a "ceramic" effect. The cropping in the case of portrait mode is appreciable on both software, but the advantage of the GCam lies precisely in the best processing of the whole image frame. In the case of the stock camera, in fact, distant elements are often “burned” by the highlights as well as a slight photographic noise. But in cases of half-light shots not even the GCam offers satisfactory results, with returning a too contrasty effect of the framed subject. On a par, depending on personal taste, the selfie photos at night with the aid of virtual flash: if with the Gcam we get a greater reality of the skin tone than the stock camera, it is true that a greater digital noise in the background comes into play. In fact, it should be noted, however, that GCam also manages to capture the details of the surrounding environment in the case of night selfies, while the stock camera only captures the subject.
[s201_bai id = "57 ″]
[s201_bai id = "58 ″]
[s201_bai id = "59 ″]
[s201_bai id = "60 ″]
In low light conditions the results seem to differ a lot from the two camera applications and as already mentioned for the initial photos, by zooming in on the details it is possible to see a better definition and sharpness in favor of the GCam, which in the case of the photo to the artistic design manages to accurately immortalize even the wood grain of the desk while in the case of the photo of the Lego character, both software have mismanaged the lights and shadows of the framed scene. In the case of photos with ultrawide lenses, the advantage obtained by the GCam is clear, which on the whole handles the highlights better without burning the framed subjects. It should also be noted that the subjects that make up the scene are less "crushed" than those captured by the MIUI stock camera.
[s201_bai id = "61 ″]
[s201_bai id = "62 ″]
[s201_bai id = "63 ″]
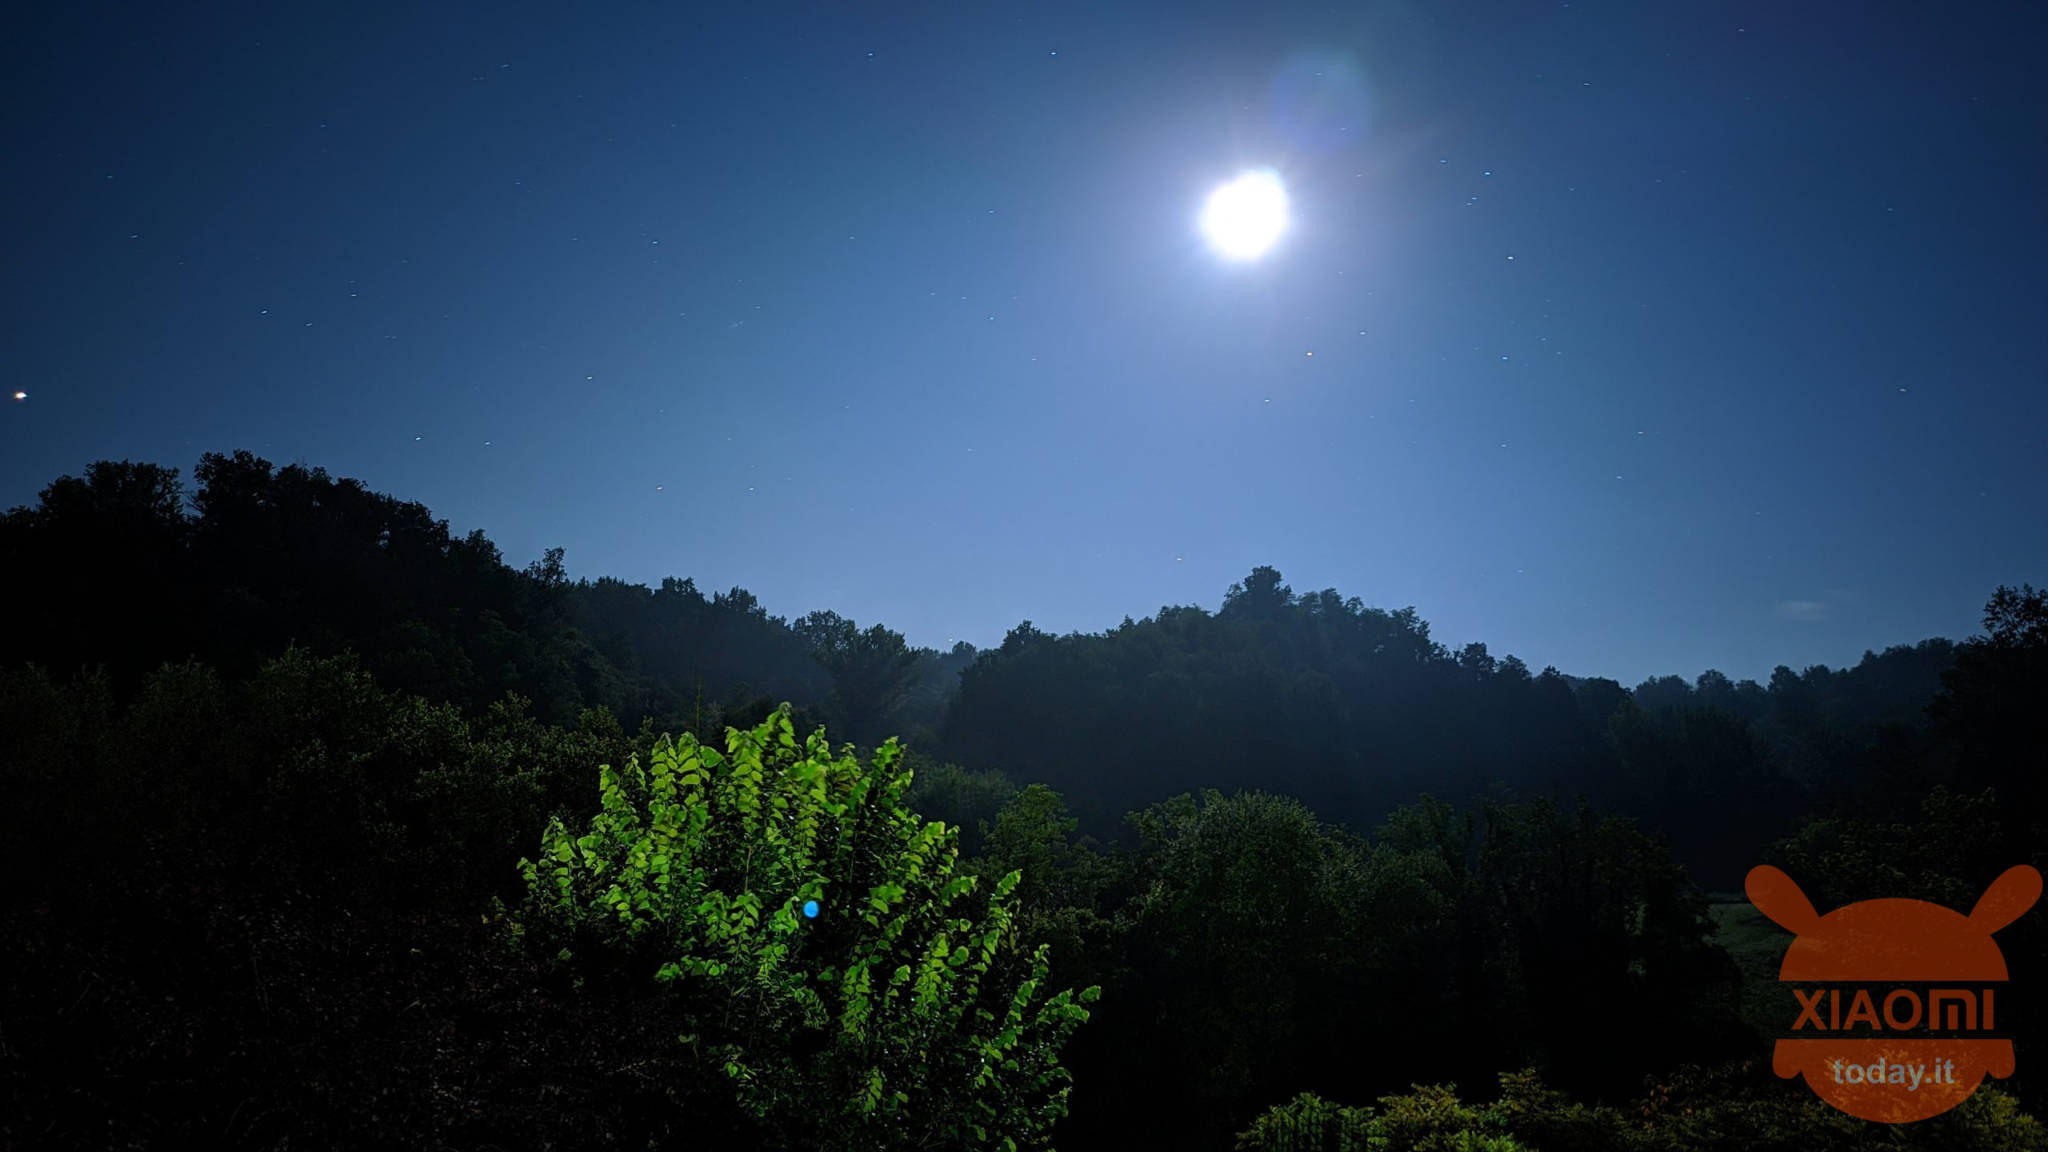
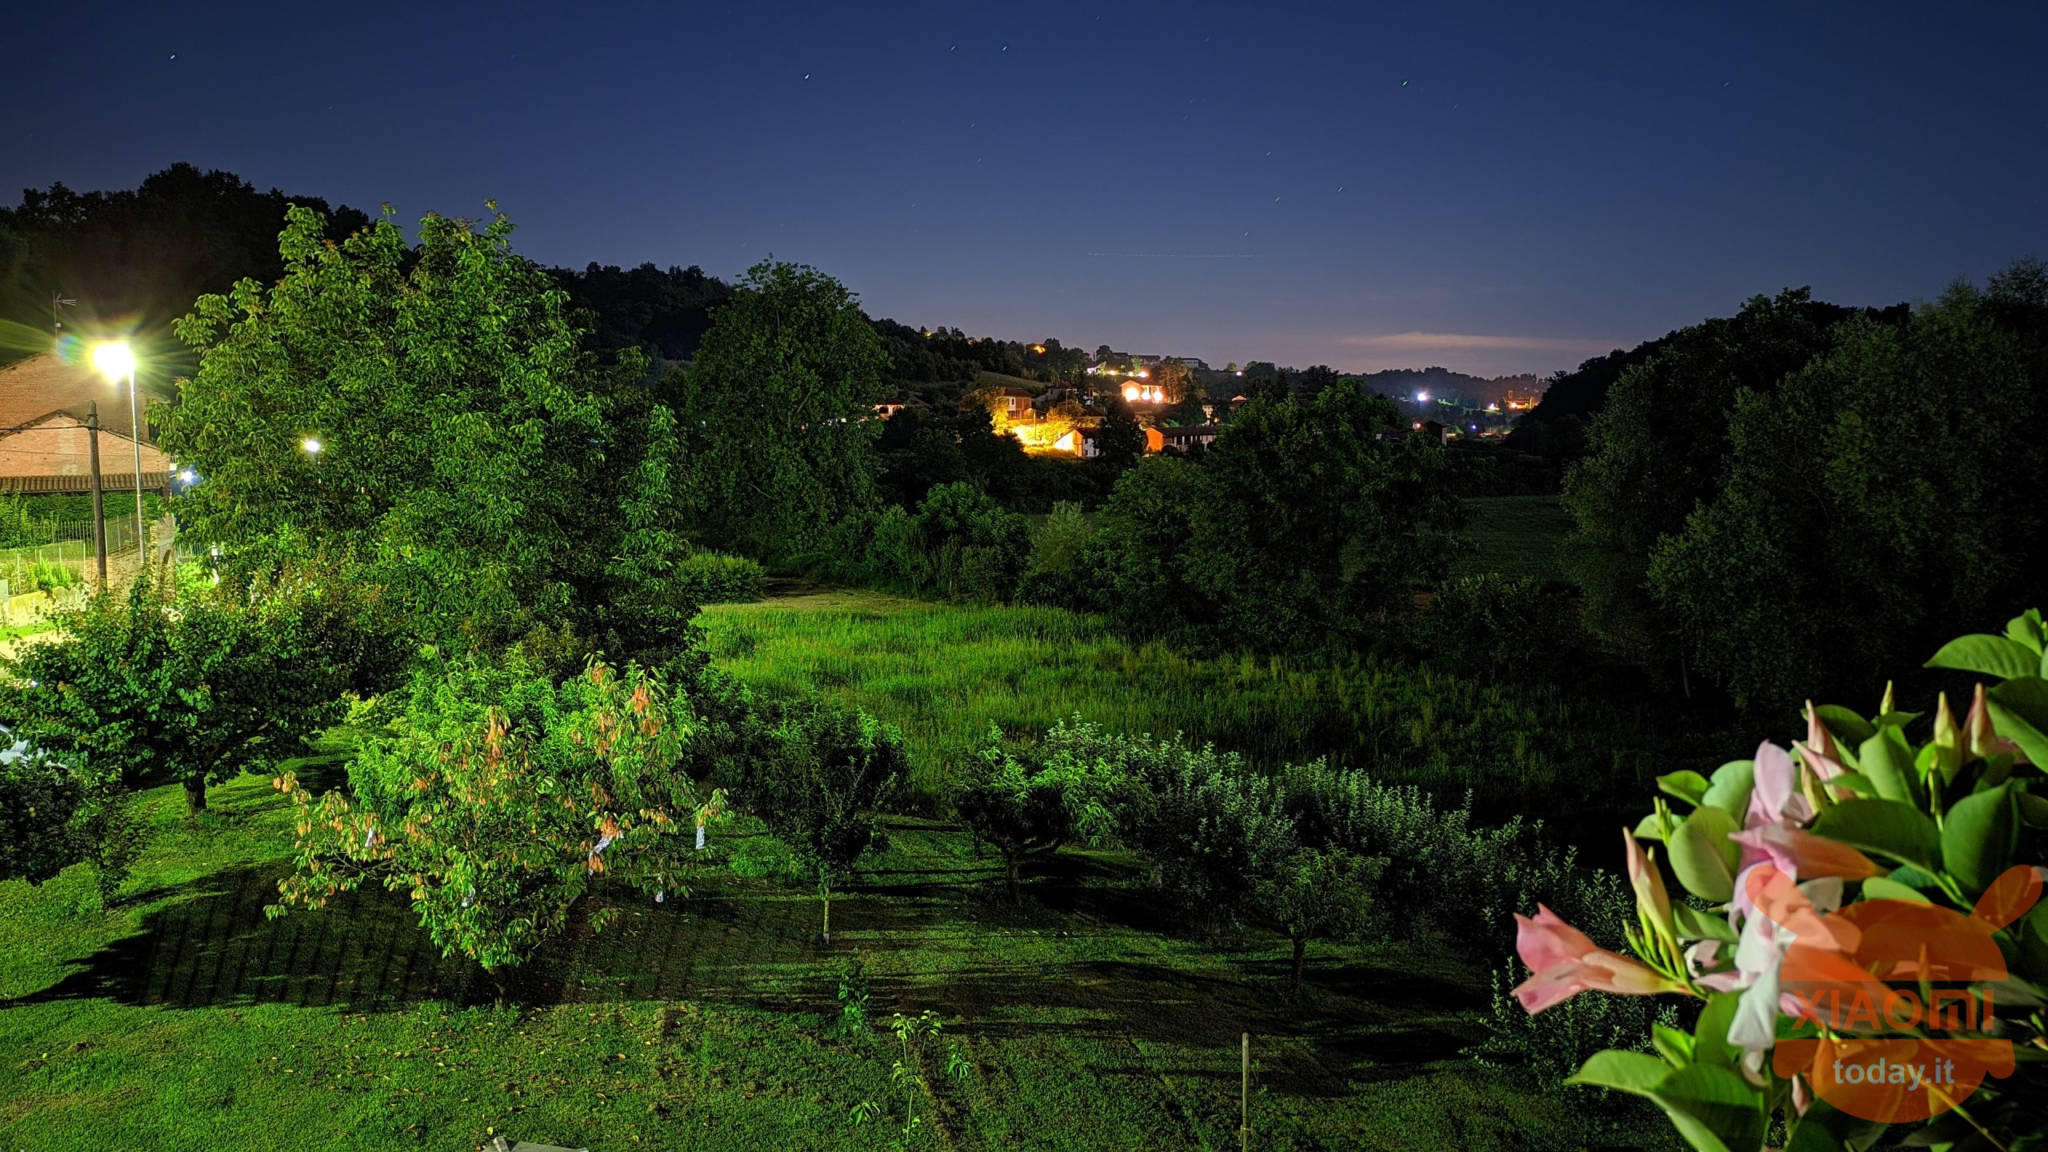
Finally we analyze the shots taken at night, where the difference in some photos is truly abysmal to the disadvantage of Redmi Note 9 Pro. In fact, we definitely find a wealth of details in the photos obtained with the GCam, as well as an absence of digital noise. The photos speak for themselves: imperfect for both software but the collection of light and data for the benefit of the GCam is impressive. The only burr is the slight greenish tinge, which is emphasized with the shots of plants and flowers, but overall this is the preferred software for the memories to be captured at night. It should be specified that the last two photos, in the case of GCam were taken in Astro mode, thus allowing true miracles to be obtained, considering that the shot took place completely in the dark.
[s201_bai id = "64 ″]
[s201_bai id = "65 ″]
[s201_bai id = "66 ″]
[s201_bai id = "67 ″]
-

- ASTROPHOTOGRAPHY MODE
-
- ASTROPHOTOGRAPHY MODE
Conclusions
Net of what we said, the GCam greatly improves the final yield of the shots in the vast majority of situations and especially in ASTROPHOTOGRAPHY mode you will be able to give yourself real works of art. Undoubtedly the advice is to install the GCam on your device, because the photos will gain a lot in terms of details while for everything else what matters is your imagination, only with that you will have photos that will excite even the coldest of hearts.
![Xiaomi Redmi Note 9 Pro Smartphone - 6.67" DotDisplay 6GB 128GB 64MP AI Quad Camera 5020mAh (typ)* NFC Tropical green [Global Version]](https://m.media-amazon.com/images/I/51Go+liKFaL._SL500_.jpg)


thanks for sharing such a good application, it works great but without the onfire folder on redmi note 9 pro eu miui 11
In my opinion.xiaomi has realized that it can't write decent software for its phones, and it knows that users then install the.gcam .
I can't go through the last configuration step. A help? The screen for the last selection does not appear
GCam / Configs7 / xml fajl (config) -without onfire folder
unfortunately I get stuck in video mode. otherwise it works perfectly. also I can not install / modify the config file, respecting the whole procedure does not find it.
would help be possible?
he made a mistake, do everything as he wrote but without the onfire folder… GCam / config7…
use a tripod Emanuele!
so you make the photos identical and the comparison is more bbbono!
To me the GCam convinces, but (at least on the Note 9 pro, I have not tried others) not in all situations. For example, I find selfies awful. Just unwatchable. HDR is rarely applied to faces, here there is no way to take it off. Ditto for other situations in which the result is good, but it does not scream a miracle.
Then for heaven's sake, my opinions.