
Let's start this short guide thanking our friends for the forum xda-developers.com which enabled the implementation of this tutorial and the spread of the Global Beta ROM for Xiaomi Mi 6. Let's say that the procedures described will be two, one for those unlocking the bootloader and one for those who unlocked it.
Procedure with BOOTLOADER LOCKED
- Mi PC Suite (English): Download Mi PC Suite
- Internet connection for ROM download
We disable driver signatures on the PC
- from the phone, go to settings -> device information and click 7 times on MIUI Version: in this way we will become developers
- always from the phone, now, let's go back to settings -> additional settings (the second item, not the one under "hotspot" but the one immediately following "memory") -> developer options and activate the Debug USB
Now let's turn off signatures on your PC.
- (if you have Windows 10 follow these steps and then proceed to the next step)notifications icon bottom right, click on all settings, then up upgrade and security, select the card for developers and choose the developer mode
- (if you have Windows 8.1 follow from here - if you have Windows 10 continue with this point) restart by holding down the SHIFT key and, when restarting, we will enter the TROUBLESHOOTING menu and then in ADVANCED OPTIONS


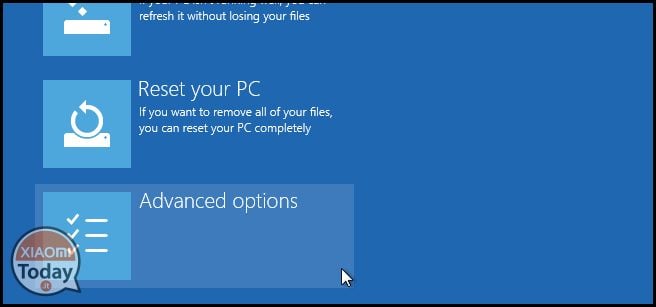
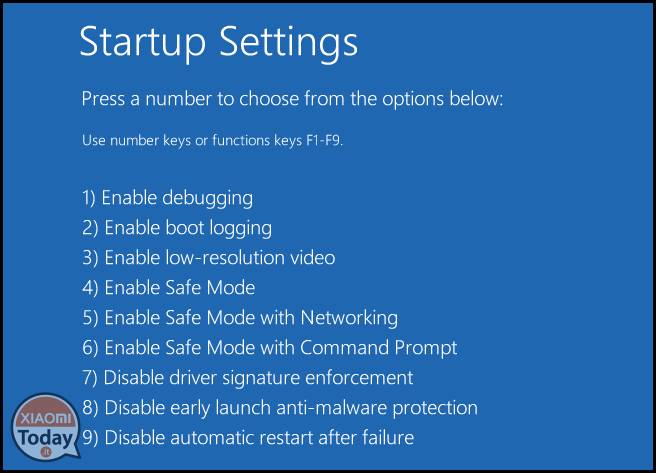

- then click on START SETTINGS and then on RIAVVIA. When you reboot, you will be presented with one list like this below and you will have to click F7 for disable driver signatures. The PC will restart automatically


We install the adb and fastboot drivers on the PC
We just restarted the PC, then download the following files:
now connect the phone to the PC and verify that it is connected in MTP mode (lower the notification curve and, if connected in "charging" mode, change it to MTP). At this point on your phone you will see a message asking you to allow USB debugging from your PC: before agreeing to it, we will post the box "always allow debugging USB from this computer"And then we give our consent.
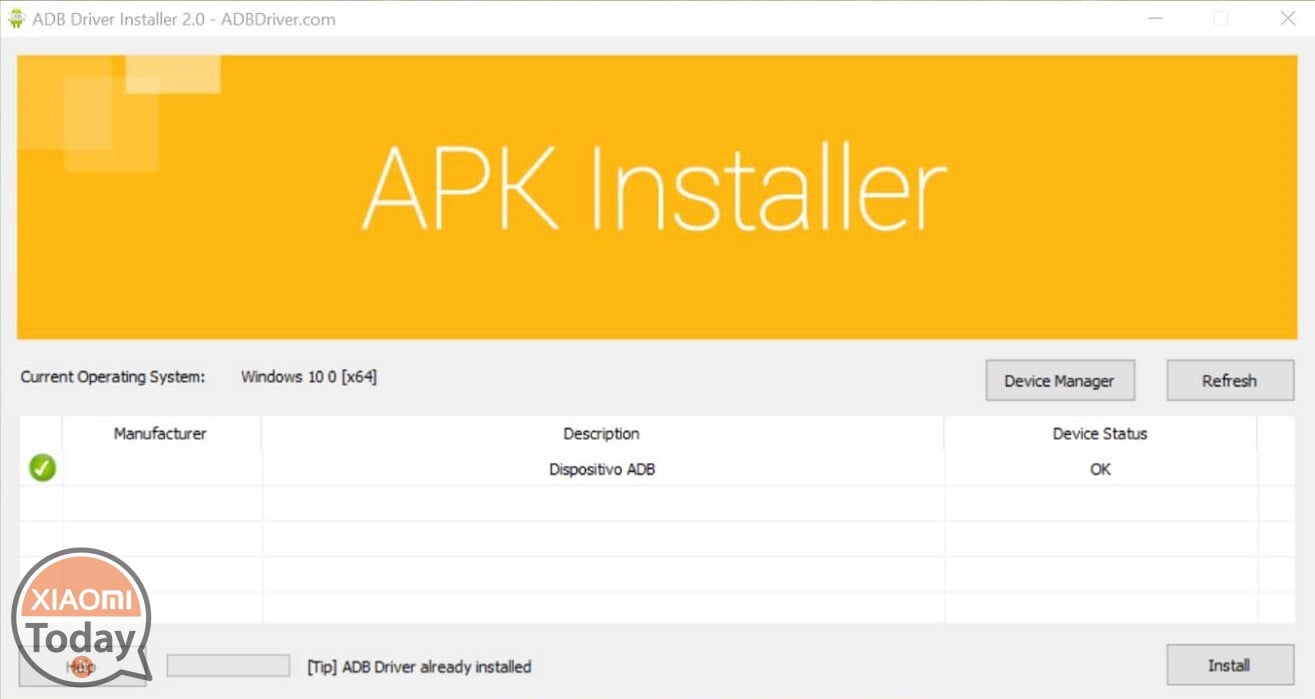
Now let's start the driver driver installation tool (right click + start as administrator) and click on install as shown below:
We put the phone in fastboot (power and volume down), we check in Device Manager (on W10 just right click on the Windows logo at bottom left) that looks like a "Kedacom USB Device". [basically your Windows build does not recognize device drivers correctly]
Click on Kedacom USB Device and the submenu will open. You should have Android Bootloader Interface. Right click on it and select "Update driver software ..", select search for driver software on your computer (option below), select search from a list of drivers on your computer, select version 7.1.0.0 and wait for the 'installation.
If you have problems, you can follow the procedure indicated by the following video demonstration.
Unplug the phone and restart the PC. Then check out Device Manager that your phone is no longer recognized as Kedacom.
Prepared by our PC, we have to proceed with the installation of Mi PC Suite that we will promptly download from the link above.
Now let's disconnect the Xiaomi Mi 6 from the PC and put it in Recovery, that is, press power and volume up and, at restart, we will have the screen where we can choose to make a wipe data (STRUCTURED BEFORE PROCESSING!). We keep the Wipe Date and then select "CONNECT WITH MI ASSISTANT". At this point we will have the Mi 6 in Recovery Stock.
We connect the phone to the PC and, only later, we launch Mi PC Suite.
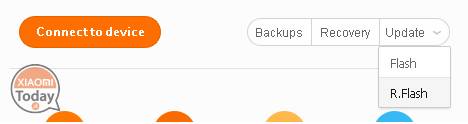
At this point our phone will NOT RECOGNIZE but you will have to click on the dart next to Update and then on R.Flash (as in the following picture).
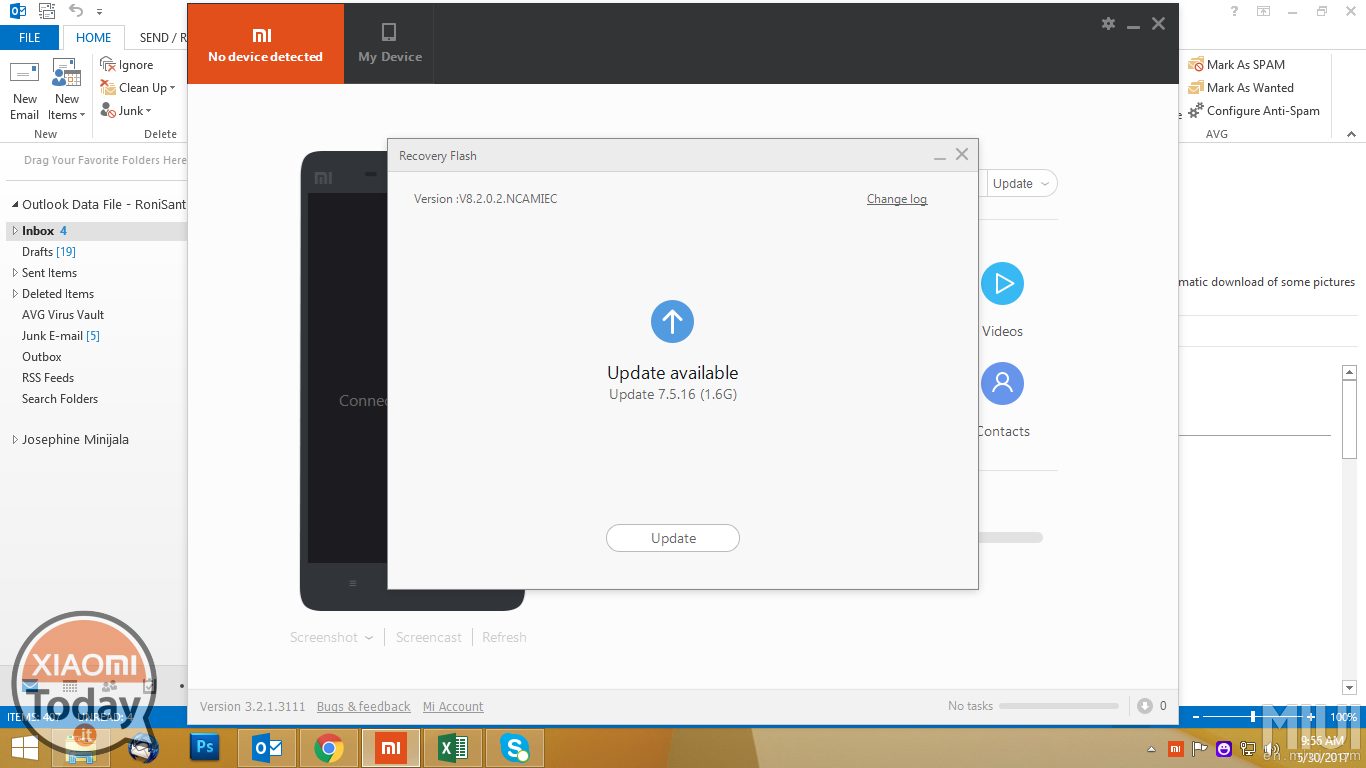
Leave Mi PC Suite the time to search for the update, and when the message in the image below appears, click Update.
Then download the ROM.

Procedure with BOOTLOADER UNLOCKED
- Unlocked Bootloader: Guide to unlock the bootloader
- TWRP 3.1.1.0 installed: Download TWRP for Xiaomi Mi 6 Guide to install the TWRP
- ROM Global Beta 7.6.1 for Xiaomi Mi 6: Download ROM Global beta
Installed TWRP and restarted the phone in TWRP, we will first have to make a "Format Reset". So let's select WIPE and, WITHOUT ENTERING THE ADVANCED WIPE MENU, click on Format Reset (the right button above the scroll bar). We confirm and DO NOT REACH THE SYSTEM!
Let's go back to the TWRP recovery start menu, click Reboot, and then click Recovery. At restart, we connect the Mi 6 (unless you have left it connected) to the PC and copy the previously downloaded Global Beta zip.
We can proceed:
- click Install
- select the ROM zip and confirm the installation
- at the end we DO NOT RETURN THE SYSTEM, but we go back to the start menu
- click on Reboot and then on Recovery
- at this point the phone should restart in Recovery Stock (Mi Recovery)
- we select Wipe Data
- at the end, click on Restart System

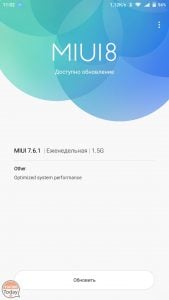
Good Global Beta 7.6.1!
As always I dedicate part of my free time to writing guides to help less experienced users. If you were satisfied with the guide and the idea you have, you can offer me a beer or a coffee to thank me. No obligation!
![]()


Excuse me but for those who have a Mac is there a way to perform the procedure?
Of course, I always do everything from virtualized Windows 10 to desktop parallels